Quick Start
n2x.io is a cloud-based Secure Access Service Edge (SASE) platform that helps businesses simplify network security and improve performance.
Designed to hide the increasing complexity in hybrid & multi-cloud network environments, n2x.io helps organizations overcome skills shortages and reduce operational costs.
Prerequisites
-
A n2x.io account. Follow these instructions to create your account.
-
Ensure sufficient permissions on your device to deploy the
n2x-nodeagent as either a Docker container or a native Linux/Windows service.
Steps
1. Add a Node to default Subnet
An n2x.io node represents any device you connect to the platform within a specific tenant. This can include virtual machines (VMs), Kubernetes pods, bare-metal servers, Docker containers, laptops, or workstations.
After a sucesssful login in n2x.io webUi, you will be redirected to the Dashboard screen. If you navigate to the left-hand menu and click on Network Topology, you can see that a default network and subnet were automatically created in the default tenant with the information provided in the account setup.
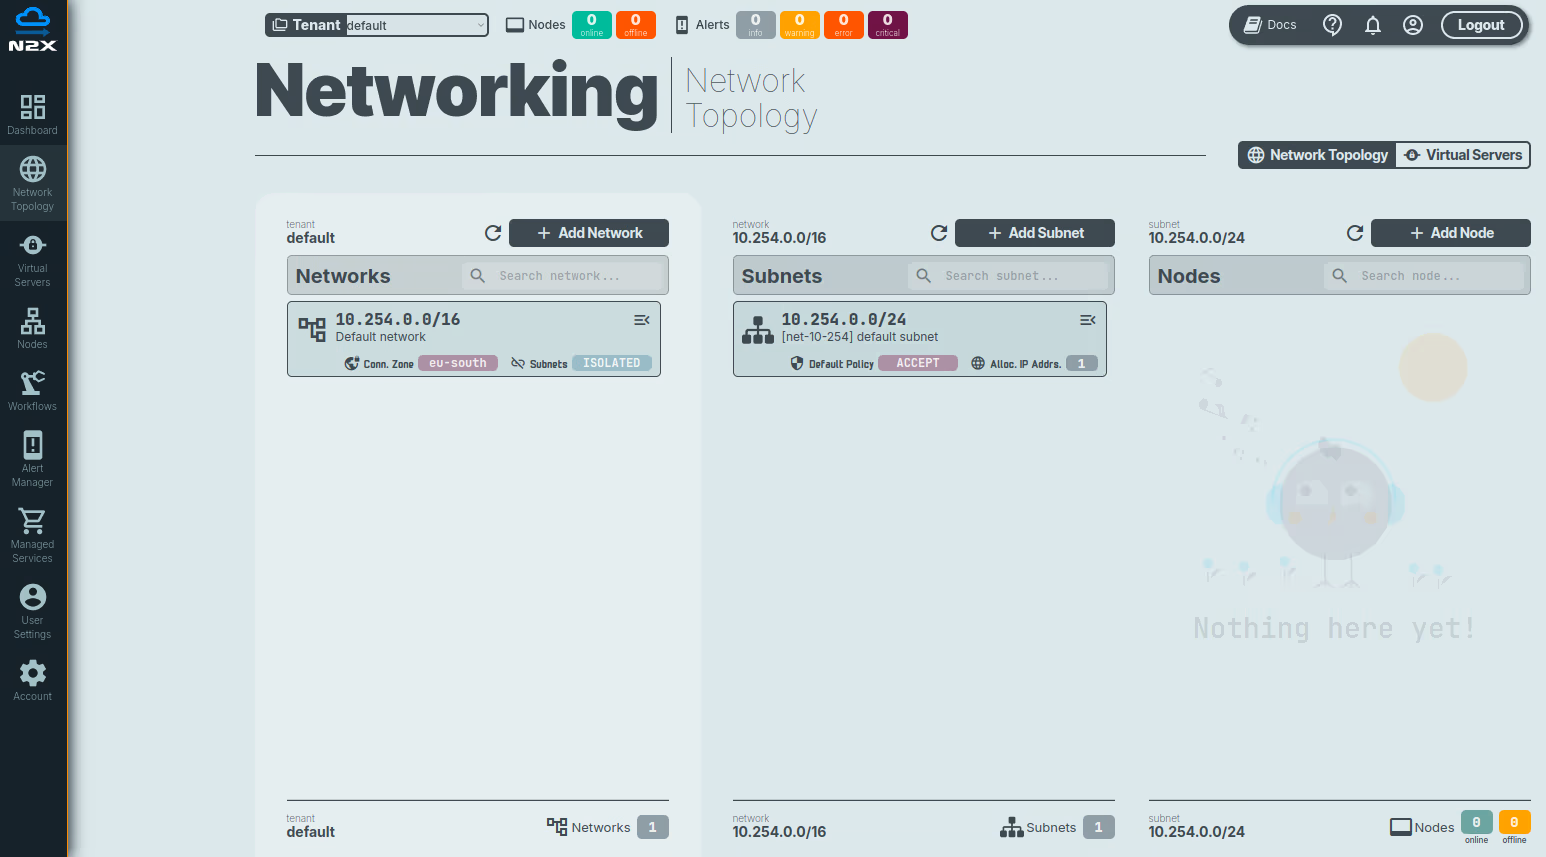
Now, you can add a new node follow these steps:
-
Click on
+ Add Nodebutton.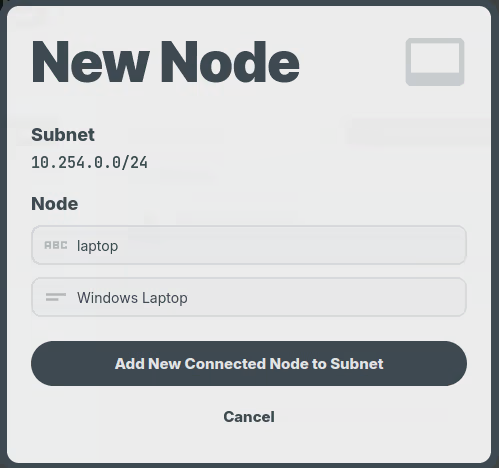
-
Enter the
NameandDescriptionfor the node. - Click on the
Add New Connected Node to Subnetbutton.
Note
See Manage Nodes section for more information.
2. Install n2x-node Agent
The n2x-node agent is an open-source application that runs on your devices or applications, allowing them to connect to the n2x.io platform. It's available for various Linux distributions, macOS, and Windows.
The n2x.io platform provides a convenient one-line command for quick and easy installation. You should have saw this command during the previous step.
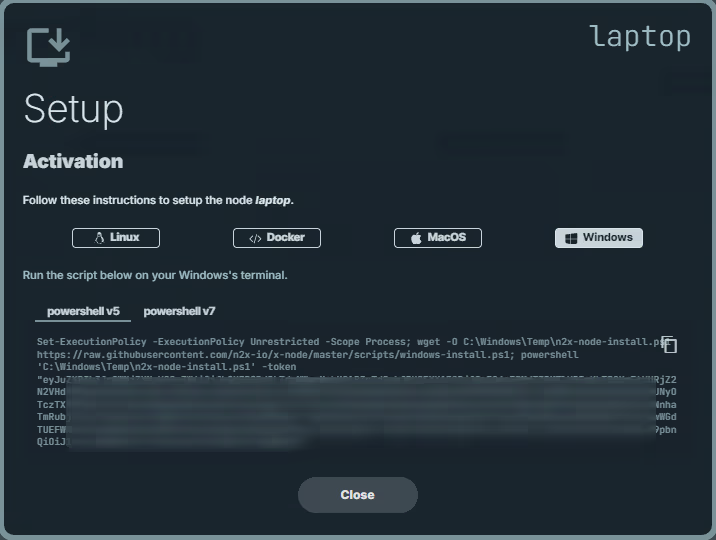
If you don't have the one-line command readily available, you can also find it within the n2x.io webUI:
- Select the
nodeyou want to install the agent on. - Click on the
Setuptab.
The one-line installation command will be displayed on this tab.

Here's how to use it:
- Open a terminal window on your device.
- Copy and paste the provided one-line command into the terminal.
This will automatically download and install the n2x-node agent on your device.
Note
For detailed instructions and alternative installation methods (manual installation, package managers), refer to the dedicated section: Install n2x-node Agent.
3. Add a Second Node to default Subnet
The true potential of n2x.io shines as you connect more devices to your network. Adding additional nodes to your subnet expands your secure connectivity. Simply repeat steps 1 and 2 to add another node.
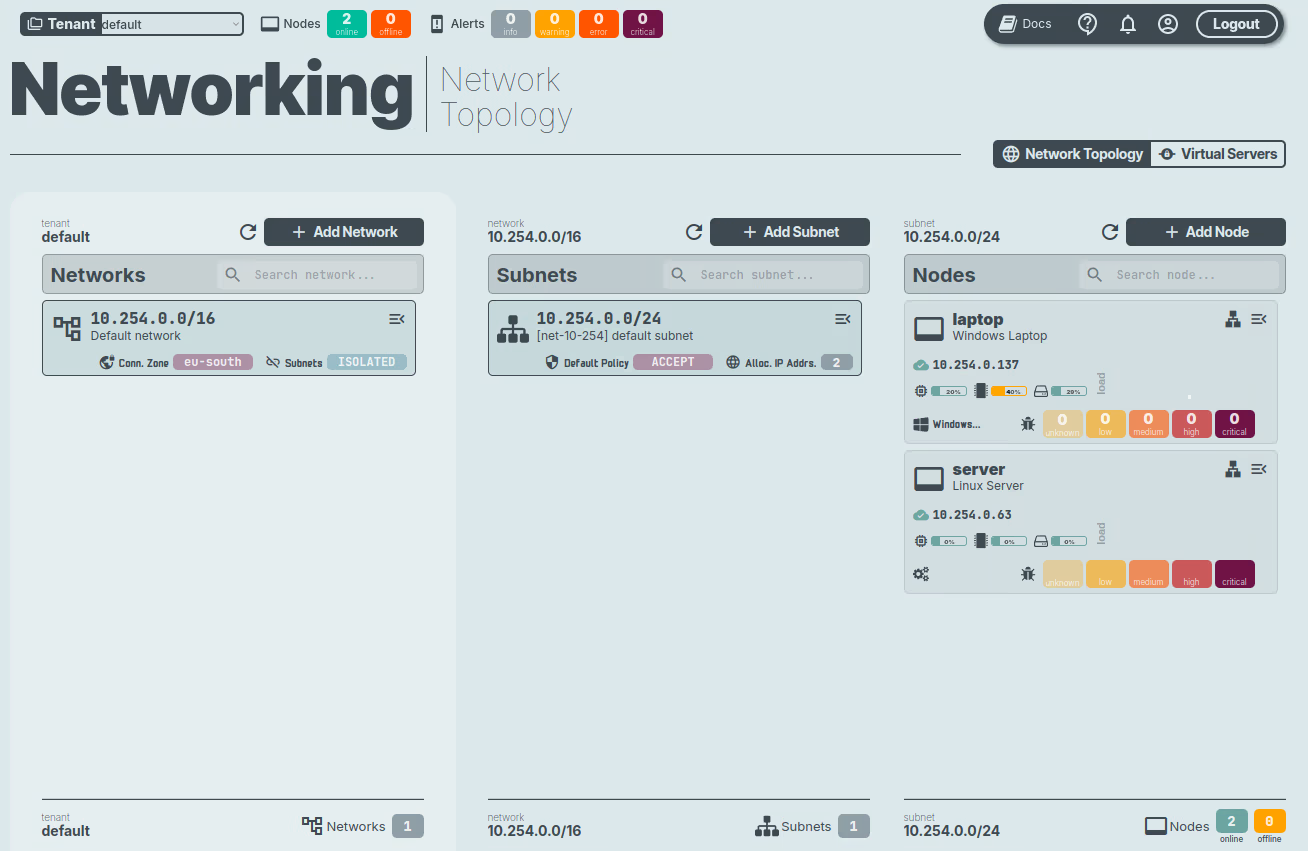
4. Verifying Connectivity
Now that you've added a second node to your subnet, it's time to verify that they can communicate with each other. We'll use a common tool called ping to test this connection:
user@server:~$ ping -c 5 10.254.0.137
PING 10.254.0.137 (10.254.0.137) 56(84) bytes of data.
64 bytes from 10.254.0.137: icmp_seq=1 ttl=64 time=34.3 ms
64 bytes from 10.254.0.137: icmp_seq=2 ttl=64 time=31.9 ms
64 bytes from 10.254.0.137: icmp_seq=3 ttl=64 time=36.2 ms
64 bytes from 10.254.0.137: icmp_seq=4 ttl=64 time=34.6 ms
64 bytes from 10.254.0.137: icmp_seq=5 ttl=64 time=32.9 ms

--- 10.254.0.137 ping statistics ---
5 packets transmitted, 5 received, 0% packet loss, time 4006ms
rtt min/avg/max/mdev = 31.863/33.985/36.247/1.503 ms
Great news!
You've successfully set up your network topology and verified connectivity between your devices on the n2x.io platform.
What's next?
By completing this guide you have your n2x.io environment up and running, you may find the following next steps helpful:
- Discover the n2x.io CLI (n2xctl)
- Manage the access to your account
- Create your network topology
- Understanding the Security Policy as Distributed Firewall (FWaaS)
- Deploy HA services across cloud and on-prem environments using n2x.io Load Balancing as a Service (LBaaS)
- Effortlessly connect your Kubernetes services and workloads to your n2x.io network
- Configure third-party services and integrations in the n2x.io platform
- Automate tasks on your nodes by creating custom workflows
- Monitor node performance and network activity
- Receive real-time alerts with n2x.io Alert Manager
Need some inspiration?
Explore our comprehensive integration guides to learn how to deploy, configure, and manage n2x.io in a wide range of contexts.
Troubleshooting and Support
Visit our Support page to report bugs, request new features or engage directly with our Support team.
For answers to common questions, explore these helpful links: