Manage Users
User management involves creating, modifying, and deleting user accounts and assigning appropriate access levels based on their needs.
n2x.io streamlines users' onboarding and empowers secure access through email-based authentication.
User Roles and Permissions
n2x.io offers a flexible user management system with three distinct user roles to control access levels within your account:
-
Account administrator (or Account Owner):
- Full access to all tenants and resources (via webUI or CLI).
- Manages admin and proxy users.
- Associated with the billing system.
- There can only be one per account.
-
Admin Users
- Full access to assigned tenants (via webUI or CLI) based on security group permissions.
- Can be assigned to one or more security groups.
- Cannot access resources exposed through Secure Gateways.
- Multiple per account, additional fees may apply.
Info
Learn more about Security Groups for granular access control.
-
Proxy Users
- Access to specific resources allowed by assigned ACLs and exposed through Secure Gateways.
- Can be assigned to one or more ACLs.
- Cannot access the webUI or CLI.
- Multiple per account, additional fees may apply.
Info
Learn more about ACLs for managing Proxy user access.
Admin Users
Create an Admin User
Warning
Only the Account Administrator can manage Admin Users.
You only can create an Admin User to your account accessing the n2x.io webUI.
In the navigation menu on the left, click Account, click on the Users section and select the Admin Users tab.
-
Click on the
+ Add Admin Userbutton.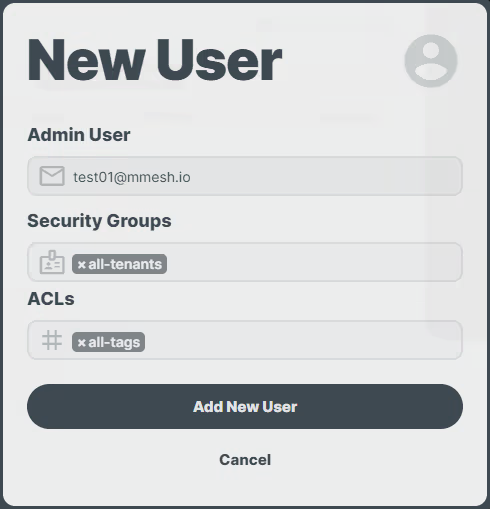
-
A new window will appear for configuring the new Admin User:
- Enter the user's
email addressin the designated field. - Select the appropriate
ACLs(Access Control Lists) to define which resources the user can access. You can find more information about ACLs here. - Assign the relevant
Security Groupsto control the user's tenant access permissions. Refer to our guide on Security Groups for further details.
- Enter the user's
-
Click on the
Add New Userbutton to finalize the creation of the new Admin User.
Edit an Admin User
Warning
Only the Account Administrator can manage Admin Users.
You only can update the ACLs and Security Groups assigned to an Admin User accessing the n2x.io webUI.
In the navigation menu on the left, click Account, click on the Users section and select the Admin Users tab.
-
Find the
Admin Useryou want to modify and click the corresponding icon.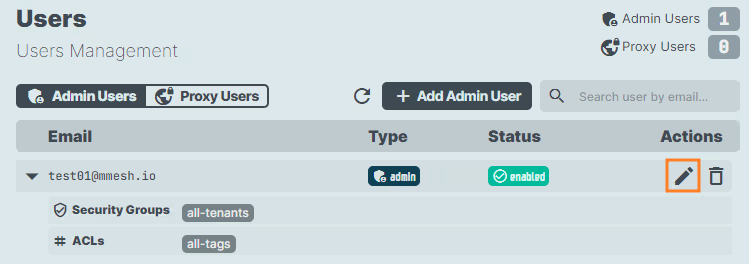
-
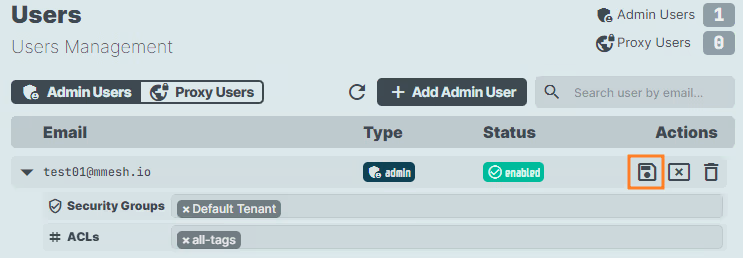
In edit mode, you can freely manage the
ACLsandSecurity Groupsassigned to this user. -
Once you've completed your modifications, click the icon to finalize the updates to your user.\
Delete an Admin User
Warning
Only the Account Administrator can manage Admin Users.
You only can delete an Admin User from your account accessing the n2x.io webUI.
In the navigation menu on the left, click Account, click on the Users section and select the Admin Users tab.
-
Find the
Admin Useryou want to delete from your account and click on the icon.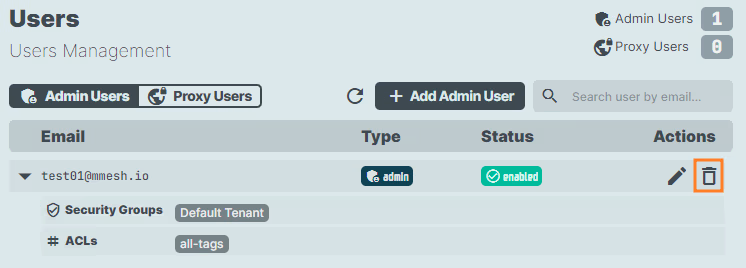
-
To permanently delete the Admin User, a confirmation prompt will appear for verification.
Proxy Users
Create a Proxy User
Warning
Only the Account Administrator can manage Proxy Users.
You only can create a Proxy User to your account accessing the n2x.io webUI.
In the navigation menu on the left, click Account, click on the Users section and select the Proxy Users tab.
-
Click on the
+ Add Proxy Userbutton.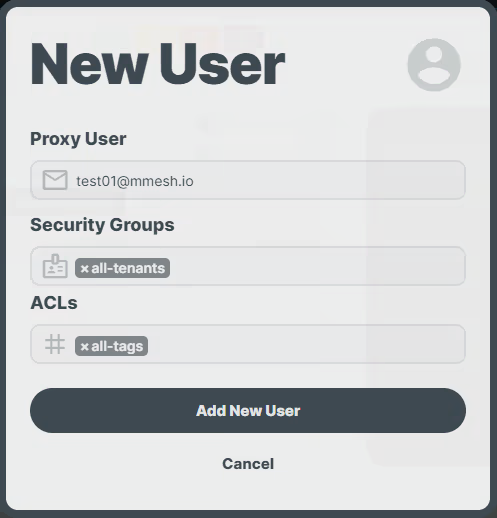
-
A new window will appear for configuring the new Proxy User:
- Enter the user's
email addressin the designated field. - Assign the relevant
Security Groupsto control the user's tenant access permissions. Refer to our guide on Security Groups for further details. - Select the appropriate
ACLs(Access Control Lists) to define which resources the user can access. You can find more information about ACLs here.
- Enter the user's
-
Click on the
Add New Userbutton to finalize the creation of the new Proxy User.
Edit a Proxy User
Warning
Only the Account Administrator can manage Proxy Users.
You only can update the ACLs and Security Groups assigned to a Proxy User accessing the n2x.io webUI.
In the navigation menu on the left, click Account, click on the Users section and select the Proxy Users tab.
-
Find the
Proxy Useryou want to modify and click the corresponding icon.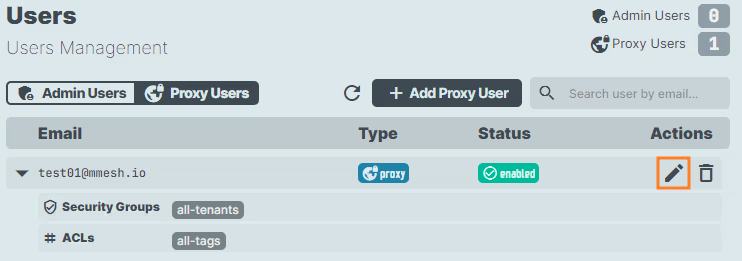
-
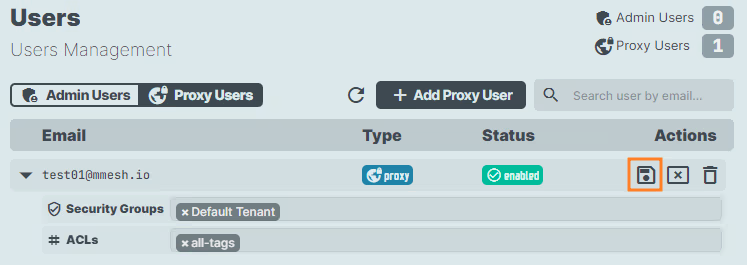
In edit mode, you can freely manage the
ACLsandSecurity Groupsassigned to this user. -
Once you've completed your modifications, click the icon to finalize the updates to your user.
Delete a Proxy USser
Warning
Only the Account Administrator can manage Proxy Users.
You only can delete a Proxy User from your account accessing the n2x.io webUI.
In the navigation menu on the left, click Account, click on the Users section and select the Proxy Users tab.
-
Find the
Proxy Useryou want to delete from your account, click on the icon.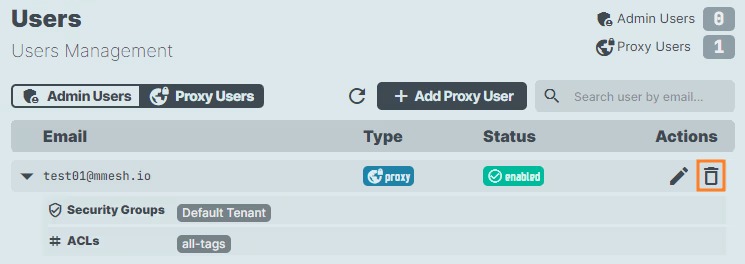
-
To permanently delete the Proxy User, a confirmation prompt will appear for verification.