DNS Integrations
To integrate the .n2x.local domain with your existing DNS, configure it as a forward zone. For configuration examples with common DNS servers, see the following section.
Dnsmasq
Dnsmasq is a lightweight, open-source DNS (Domain Name System) forwarder and DHCP (Dynamic Host Configuration Protocol) server. It is designed to provide DNS and DHCP services for a small network or a single machine. Dnsmasq is commonly used in home routers, small networks, and as a local DNS resolver on individual computers.
If you want to resolve the .n2x.local domain from your network, you need to configure a new forward zone in your DNS servers:
-
Edit the
/etc/dnsmasq.conffile and add the following configuration snippet:#dont use hosts nameservers no-resolv #use following default nameservers server=1.1.1.1 server=8.8.8.8 strict-order #serve all *.n2x.local queries using a specific nameserver server=/n2x.local/<NODE1-IP>#53535 server=/n2x.local/<NODE2-IP>#53535Warning
Replace the
<NODE1-IP>and<NODE2-IP>with the actual IP addresses assigned to yourn2x-nodes. These nodes should also be reachable by the server running Dnsmasq. -
Restarting dnsmasq service:
sudo systemctl restart dnsmasq
Bind9
BIND 9 is the first, oldest, and most commonly deployed solution for DNS servers. It has evolved to be a very flexible, full-featured DNS system. More network engineers are already familiar with BIND 9 than with any other system.
If you want to resolve the .n2x.local domain from your infrastructure, you need to configure a new forward zone in your DNS servers:
-
Edit the
/etc/bind/named.conf.localfile and add the following configuration snippet:zone "n2x.local" { type forward; forward only; forwarders { <NODE1-IP> port 53535; <NODE2-IP> port 53535; }; };Warning
Replace the
<NODE1-IP>and<NODE2-IP>with the actual IP addresses assigned to yourn2x-nodes. These nodes should also be reachable by the server running Bind. -
Run the following command to check the syntax of the
named.conf*files:3. Restarting BIND:sudo named-checkconfsudo systemctl restart bind9Info
If you have errors like
no valid RRSIG resolvingandbroken trust chain resolvingyou should change the paramdnssec-validationin/etc/bind/named.conf.optionsfromautotoyes.
DNS Windows Server
In Windows Server 2016, DNS is a server role that you can install by using Server Manager or Windows PowerShell commands.
If you want to resolve the .n2x.local domain from your infrastructure, you need to configure a new forward zone in your DNS servers:
Using DNS Manager
First, you need to create the forward zone .n2x.local following these steps:
- Open the DNS Manager. You can do this by searching for
dnsmgmt.msin the Start menu. - In the console tree, right-click on the forward lookup zone for your domain (usually named
forward lookup zonesor the name of your domain) and selectNew Zone... - In the New Zone Wizard, select
A delegated zoneand clickNext. - In the
Delegate to a DNS serveroption, chooseDo not delegate this zone (standalone primary zone). ClickNext. - Enter
n2x.localfor the zone name and clickNext. - Select
Primary zoneand clickNext. - Review the summary and click
Finishto create the zone.
Then, you can configure the zone properties:
- In the console tree, right-click on the newly created
n2x.localzone and selectProperties. - Go to the
Forwarderstab and clickNew...button to add a forwarder. - Enter the IP address of your first DNS server (
<NODE1-IP>) and port53535. ClickOKto add the forwarder. - Repeat step 3 to add the IP address of your second DNS server (
<NODE2-IP>) with port53535. - Click
OKon the zone properties window to save the changes.
Using PowerShell (alternative)
Here's a PowerShell script to achieve the same configuration:
New-DnsZone -Name "n2x.local" -Primary -ZoneType Forwarder
Add-DnsServerForwarder -ZoneName "n2x.local" -Server "<NODE1-IP>" -Port 53535
Add-DnsServerForwarder -ZoneName "n2x.local" -Server "<NODE2-IP>" -Port 53535
Warning
Replace the <NODE1-IP> and <NODE2-IP> with the actual IP addresses assigned to your n2x-nodes. These nodes should also be reachable by the server running DNS Windows.
Kubernetes DNS
CoreDNS is a flexible and extensible DNS server that is used as the default DNS provider in Kubernetes clusters. It handles DNS resolution for services and pods within the cluster. CoreDNS can configure stub domains and upstream nameservers using the forward plugin.
If you want to resolve .n2x.local domain inside the pods, you need to customize CoreDNS:
-
Get CoreDNS current configuration:
2. Customize CoreDNS configuration and add thekubectl -n kube-system get cm coredns -o yaml > coredns.yaml.n2x.localzone tocoredns.yaml:data: Corefile: | .:53 { errors health { lameduck 5s } ready kubernetes cluster.local in-addr.arpa ip6.arpa { pods insecure fallthrough in-addr.arpa ip6.arpa ttl 30 } prometheus :9153 forward . /etc/resolv.conf { max_concurrent 1000 } cache 30 loop reload loadbalance } ## Add .n2x.local zone n2x.local { forward . <NODE1-IP>:53535 <NODE1-IP>:53535 { policy sequential } }Warning
Replace the
<NODE1-IP>and<NODE2-IP>with the actual IP addresses assigned to yourn2x-nodes. These nodes should also be reachable by CoreDNS pods. -
Apply the new changes in the cluster:
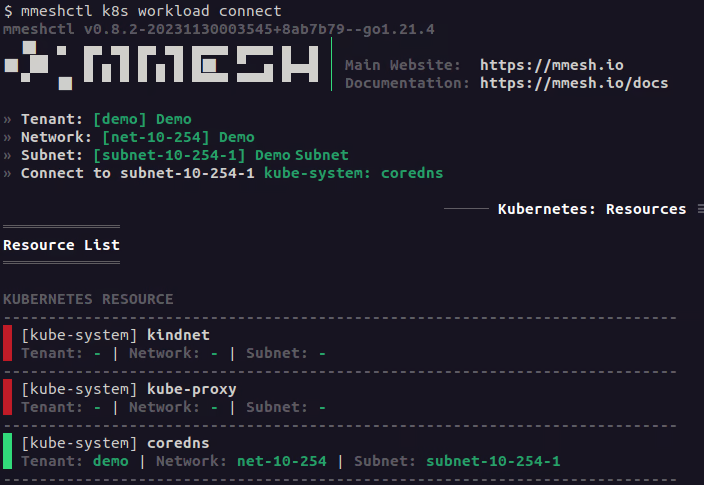
4. Reload CoreDNS config:kubectl rollout restart -n kube-system deployment/coredns5. Finally, we need to connectkubectl rollout restart -n kube-system deployment/corednscorednsworkload to the n2x.io network topology:n2xctl k8s workload connectYou should select the
tenant,networkandsubnetpreviously defined in your n2x.io private virtual topology.