Enable Networking Routing in Nodes
Routing is fundamental to efficient network communication, ensuring data packets reach their intended destinations across diverse networks and devices.
n2x-node agent empowers you to configure routing policies, transforming it into a versatile router within your network infrastructure. This capability is invaluable for building gateways between VPCs, VNets, and other network segments.
Configuring Routes
To configure routing on an n2x-node, modify the n2x-node.yml file:
# network routes behind this node (optional)
routes:
  export:
    - <Exported network CIDR>  # Example: 172.0.0.0/20
  import:
    - <Imported network CIDR>  # Example: 192.168.0.0/16
Just replace the Exported/Imported network with your network CIDR (e.g., 192.168.1.0/24) and add a new line for every subnet you need to export or import. For importing all routes from other nodes, simply replace the list with any.
Important Considerations
- Changes to the
n2x-node.ymlfile require a node restart to take effect. - Misconfigured routes can disrupt network traffic. Avoid using
anyunless fully understood. - Consider using specific CIDR ranges for imports to enhance network security and control.
By effectively managing routes on your n2x-nodes, you can create sophisticated network topologies and optimize data flow within your infrastructure.
Enabling IP Forwarding for Routing
To enable routing functionality on your node, you'll need to configure IP forwarding at the operating system level.
For Linux systems, enable IP forwarding by modifying the net.ipv4.ip_forward kernel parameter. You can do this by executing the following command:
sudo sysctl -w net.ipv4.ip_forward=1
To make it permanent, add the following line to /etc/sysctl.conf file:
net.ipv4.ip_forward=1
- Open the
Registry Editorby searching forregeditin the Start menu. - Go to the
Computer\HKEY_LOCAL_MACHINE\SYSTEM\CurrentControlSet\Services\Tcpip\Parametersfolder. - Change the value of the
IPEnableRouterfrom 0 to 1.
- Restart your Windows server for the changes to take effect.
Cloud Provider Specific Routing Considerations
Each cloud provider requires an additional configuration for VMs to be able to work as routers. Let's describe each of them:
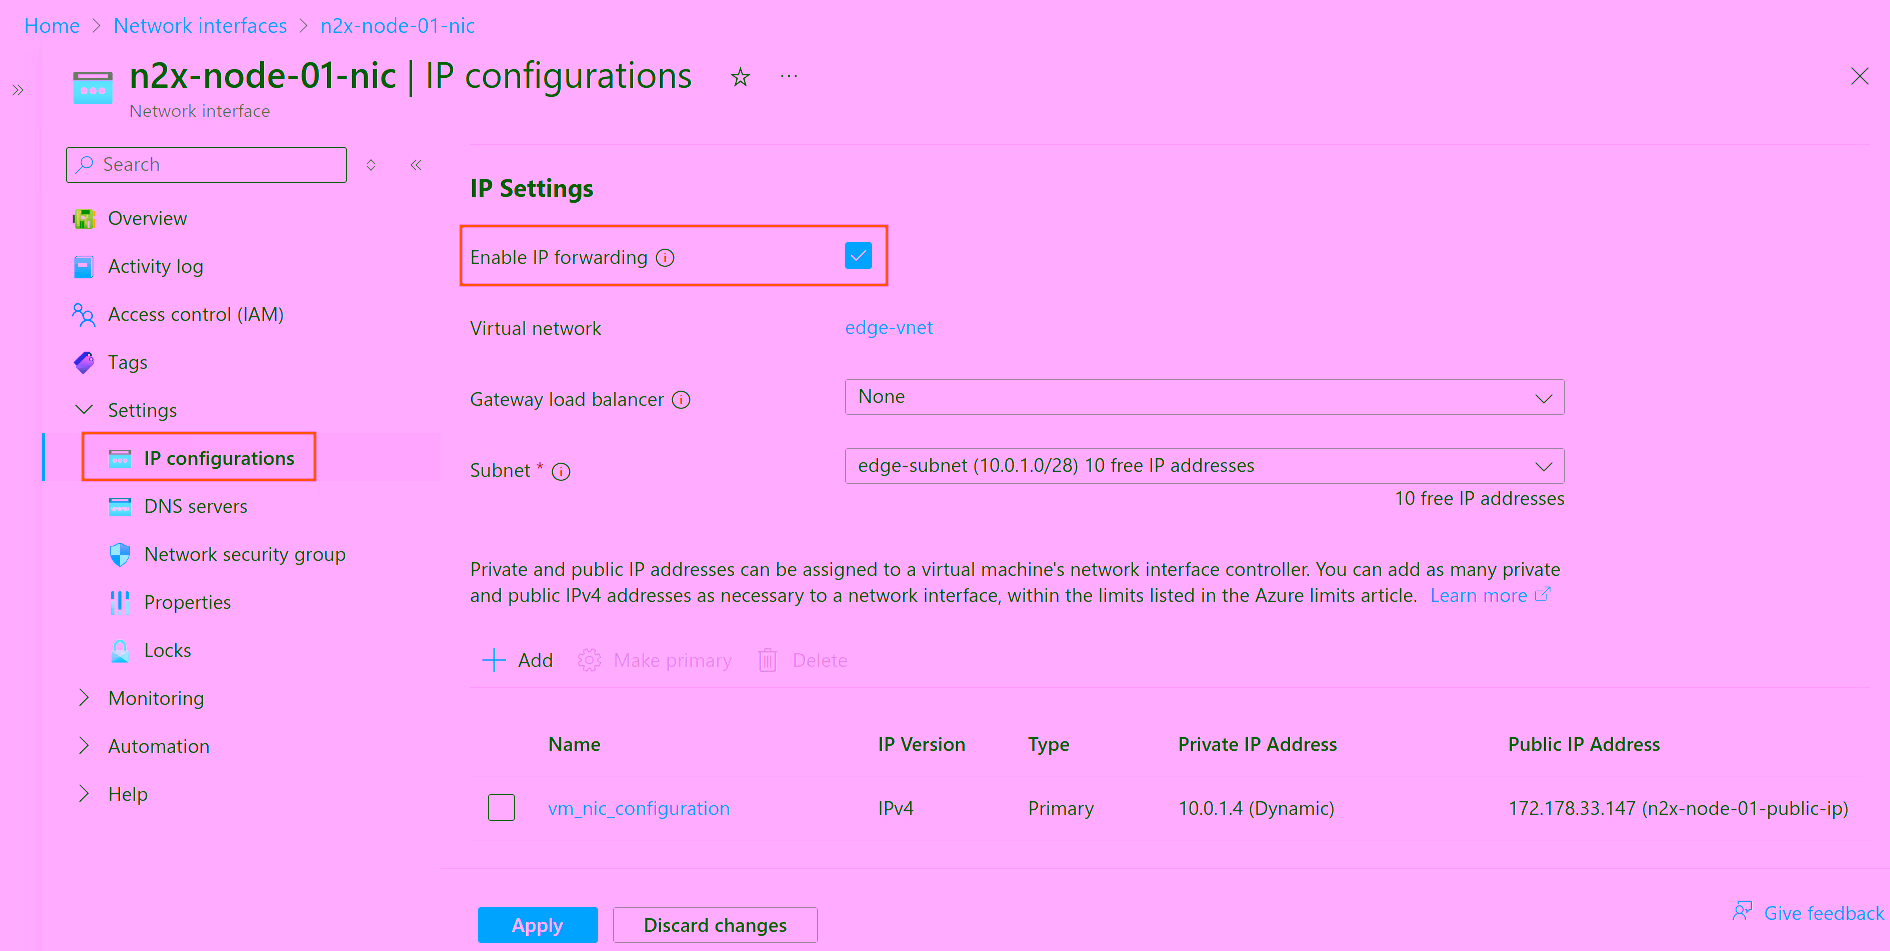
For VMs running on Microsoft Azure, enabling IP forwarding on the Network Interface is the additional configuration required for them to function as routers within an n2x.io network.
Once the VM is created, it is required to enable IP forwarding on the Network Interface. Search for Network interfaces in the portal's search bar and select your VM's Network Interface. Under the Settings menu, select IP Configurations. Check the Enable IP forwarding option and click Apply.
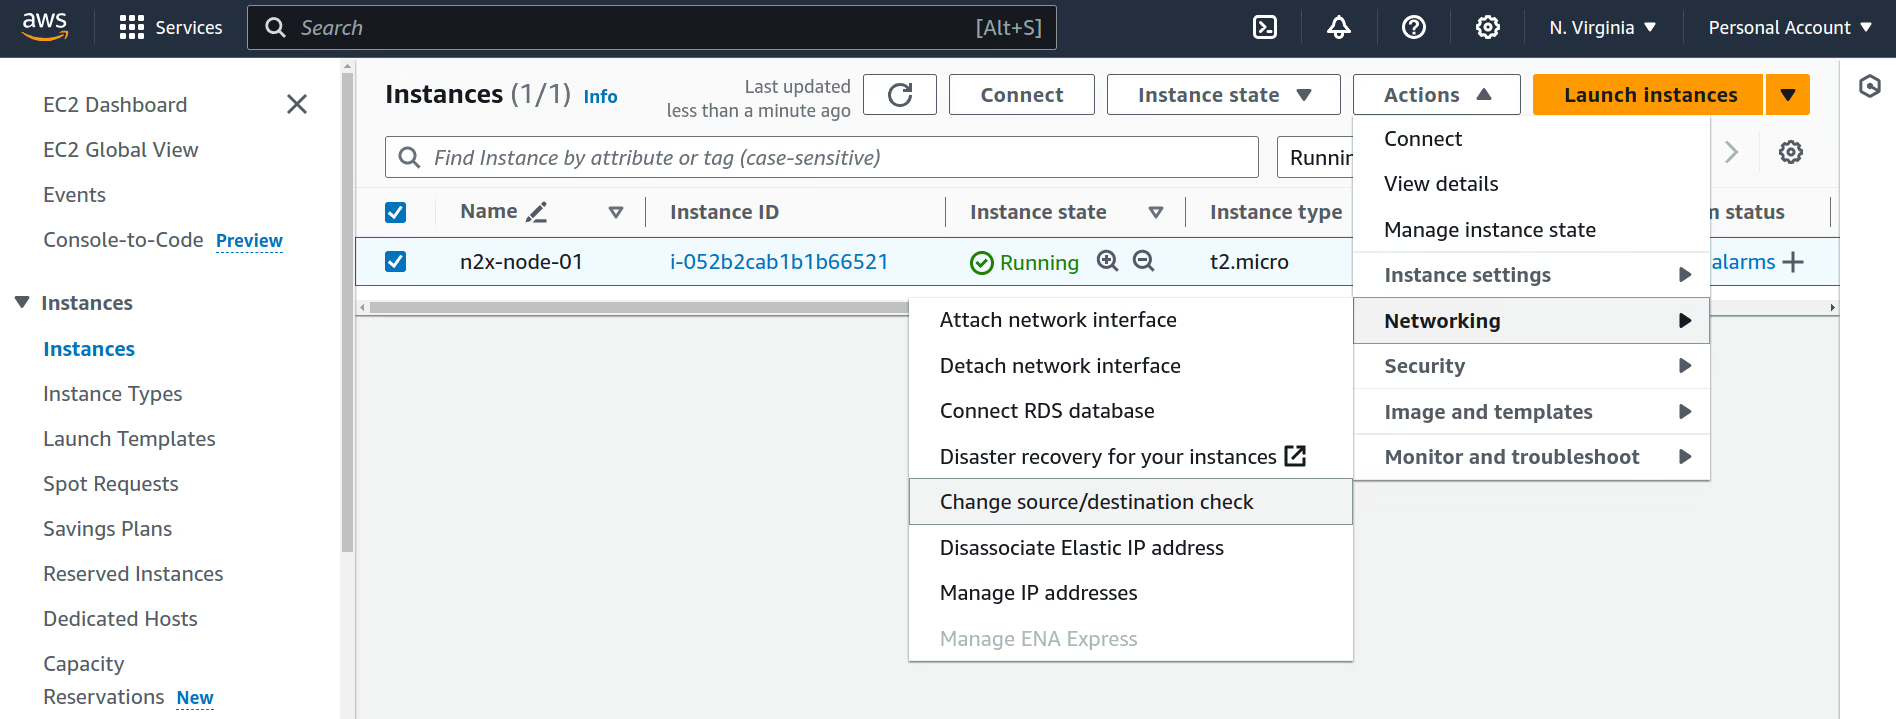
On Amazon Web Services (AWS), to allow your VM to route traffic within the n2x.io network, you'll need to disable the network source/destination check.
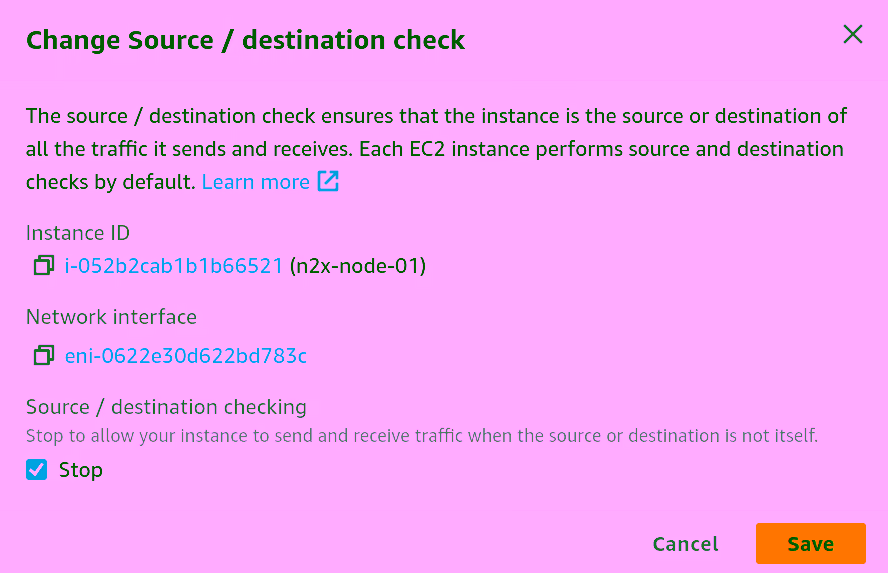
Once the VM is created, navigate to the EC2 Dashboard in the AWS Console and select the instance. On the menu choose Actions > Networking > Change Source/Destination Check.
Select Stop and Save.
When creating Google Cloud Platform (GCP) VMs that you intend to use as routers within the n2x.io network, ensure you enable IP forwarding in the advanced networking options.
To configure a Google Cloud VM instance as a router within the n2x.io network, enable IP forwarding during VM creation. Simply expand the Advanced Options and Networking sections, then locate the IP forwarding option and select the Enable checkbox.

Effortless Network Connectivity & Integration with n2x.io
n2x.io's robust networking routing capabilities simplify communication across your on-premises infrastructure, branches, cloud environments, and users. Build intricate communication solutions in minutes, not days. Explore our comprehensive integration guides to discover step-by-step instructions for seamless integration with various tools and platforms.