How to Connect Directly to your AWS VPC
This tutorial empowers you to deploy an n2x-node within an Amazon Virtual Private Cloud (Amazon VPC) and configure it to directly access existing EC2 instances in a private subnet. Streamline your workflow and prioritize security by eliminating the need for a bastion host and enabling direct, encrypted private access from any node in the n2x.io network topology.
Here is the high-level overview of tutorial setup architecture:

Note
This guide demonstrates how to deploy a single n2x-node within a single availability zone. To achieve high availability failover, multiple n2x-nodes can be deployed across multiple availability zones and configured to export the same routes.
In our setup, we will be using the following components:
-
With Amazon Virtual Private Cloud (Amazon VPC), you can launch AWS resources in a logically isolated virtual network that you've defined. For more info please visit the AWS Documentation
-
n2x-node is an open-source agent that runs on the machines you want to connect to your n2x.io network topology. For more info please visit n2x.io Documentation.
Before you begin
In order to complete this tutorial, you must meet the following requirements:
-
An AWS account.
-
A n2x.io account and one subnet with
10.254.1.0/24prefix.
Note
Please note that this tutorial uses a Linux OS with an Ubuntu 24.04 (Noble Numbat) with amd64 architecture.
Step-by-step Guide
Step 1 - Deploying a n2x-node in AWS
Follow this step-by-step guide to set up an n2x-node in AWS. This guide will walk you through creating all the necessary infrastructure within the cloud service provider, including a VPC, public subnet, internet gateway, network security group, and instance.
An additional step is required
You'll need to add an outbound rule to the n2x-node security group allowing all traffic to the 10.0.1.128/28 private subnet.
Step 2 - Configuring n2x-node instance to export VPC CIDR
Before configuring n2x-node-01 to export VPC CIDR, we need to enable IPv4 forwarding it at the Linux OS within the AWS Instance and disable source/destination check to allow forward IPv4 packets. Here's how to do it:
Now, to make the VPC CIDR available on your n2x.io subnet we need to configure the n2x-node-01 to export this CIDR. For this, we need to edit /etc/n2x/n2x-node.yml and add the following configuration:
# network routes behind this node (optional)
routes:
  export:
    - <VPC CIDR>
  import:
Info
Replace <VPC CIDR> with the VPC CIDR value, in this case is 10.0.1.0/24.
Restart the n2x-node service for this change to take effect:
sudo systemctl restart n2x-node
Step 3 - Deploying Private EC2 Instances
Before creating the Private EC2 Instances we need to create a private subnet and some additional resources:
-
Create a private subnet in the VPC as described in the following table. For more information, see Creating a Subnet:
Subnet Settings
Subnet name tag VPC AZ IPv4 CIDR edge-pri-net-az1 edge us-east-1a 10.0.1.128/28 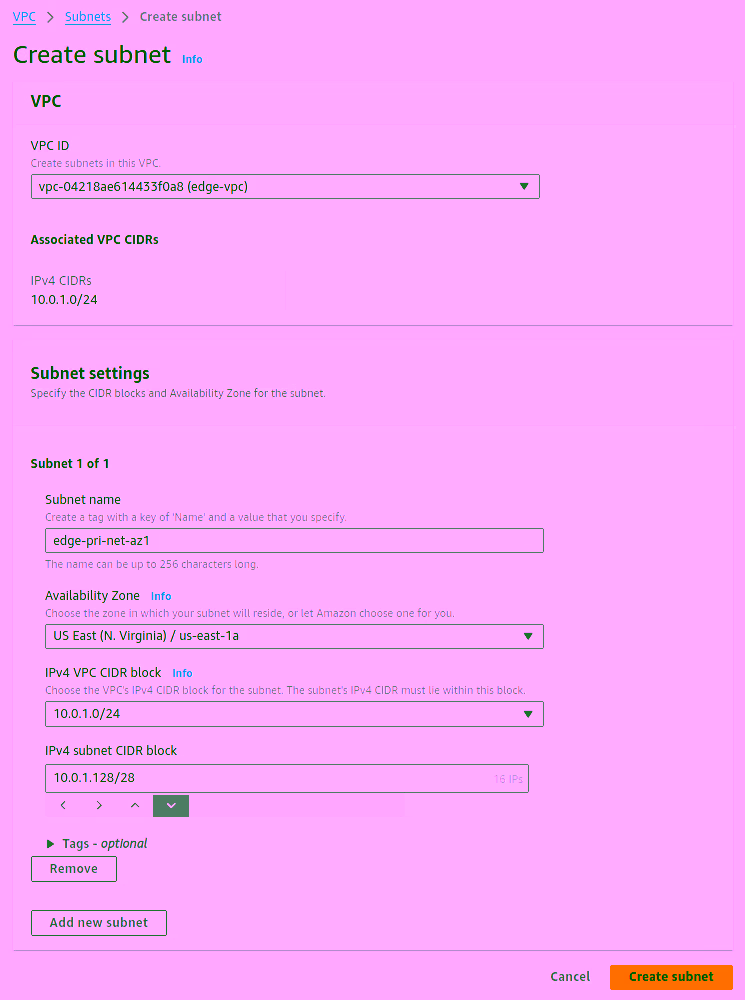
-
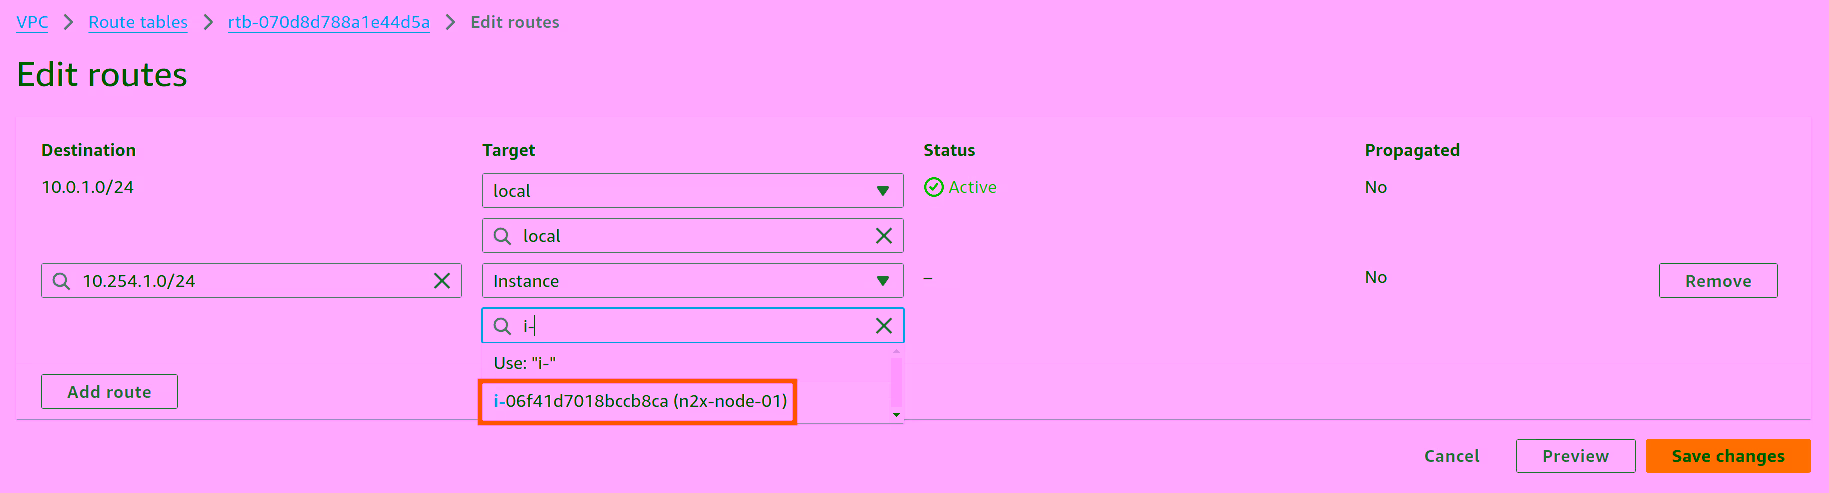
Create a routing table for the
edge-pri-net-az1private subnet and add a new route in the route table with the destination10.254.1.0/24(n2x.io subnet CIDR) to be routed throughn2x-node-01instance. For more information, see Adding and Removing Routes from a route table.Routing Table Settings
Route table name tag VPC edge-pri-net-rt edge 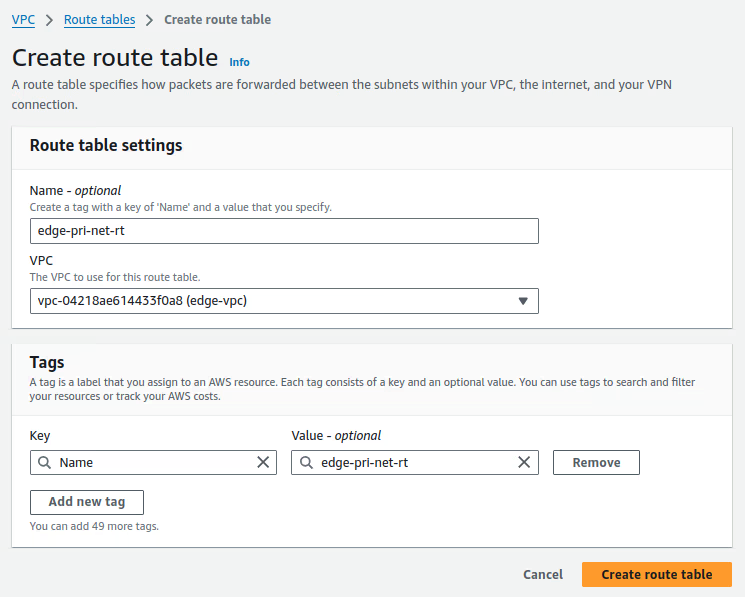
-
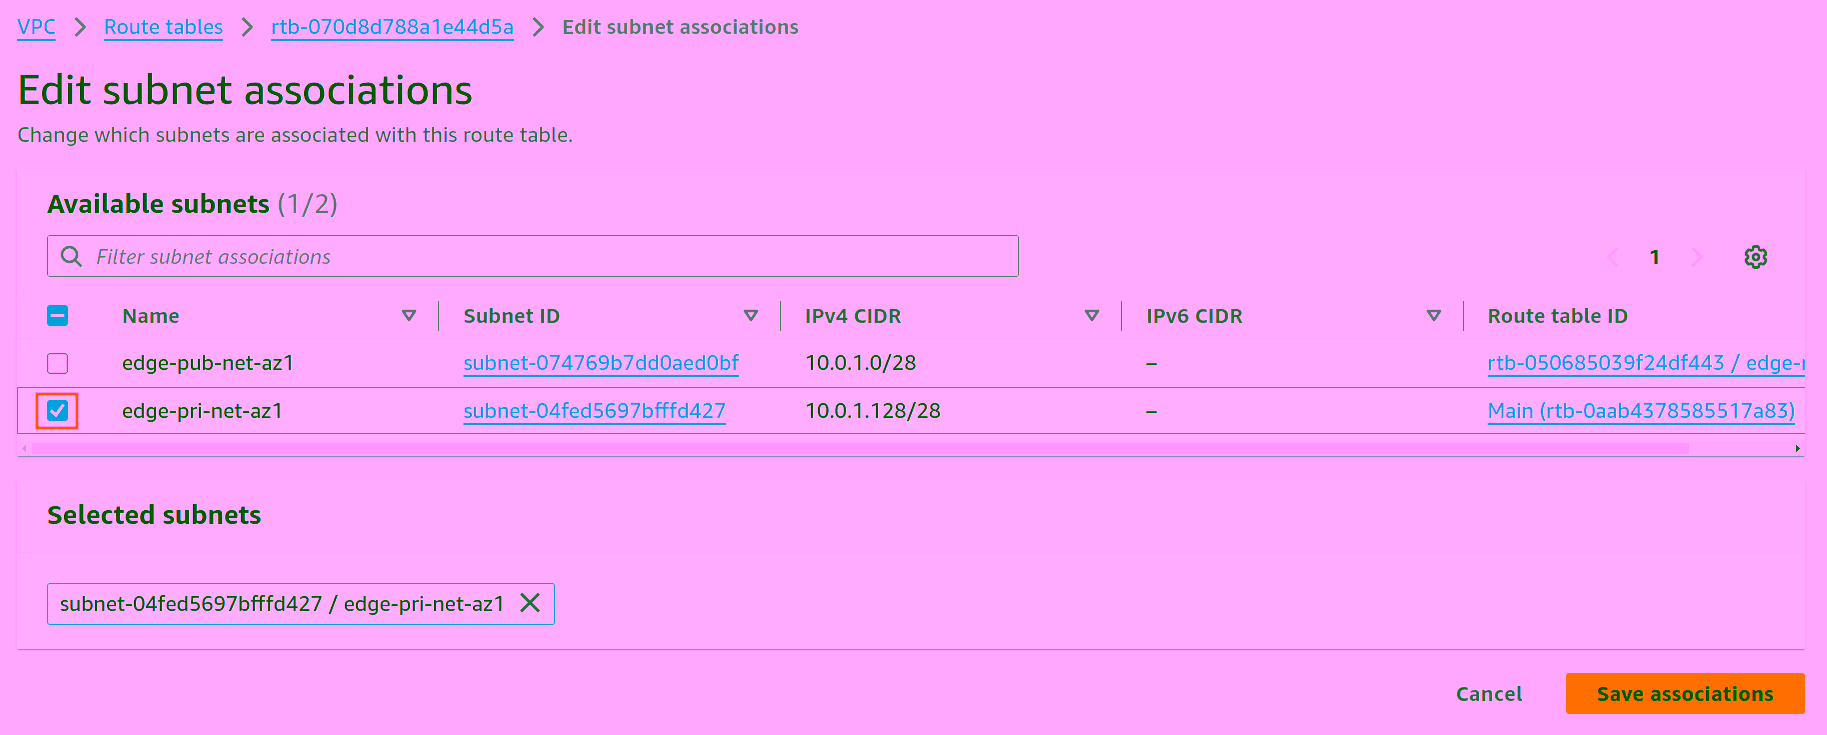
We must now associate the
edge-pri-net-rtrouting table with theedge-pri-net-az1private subnet.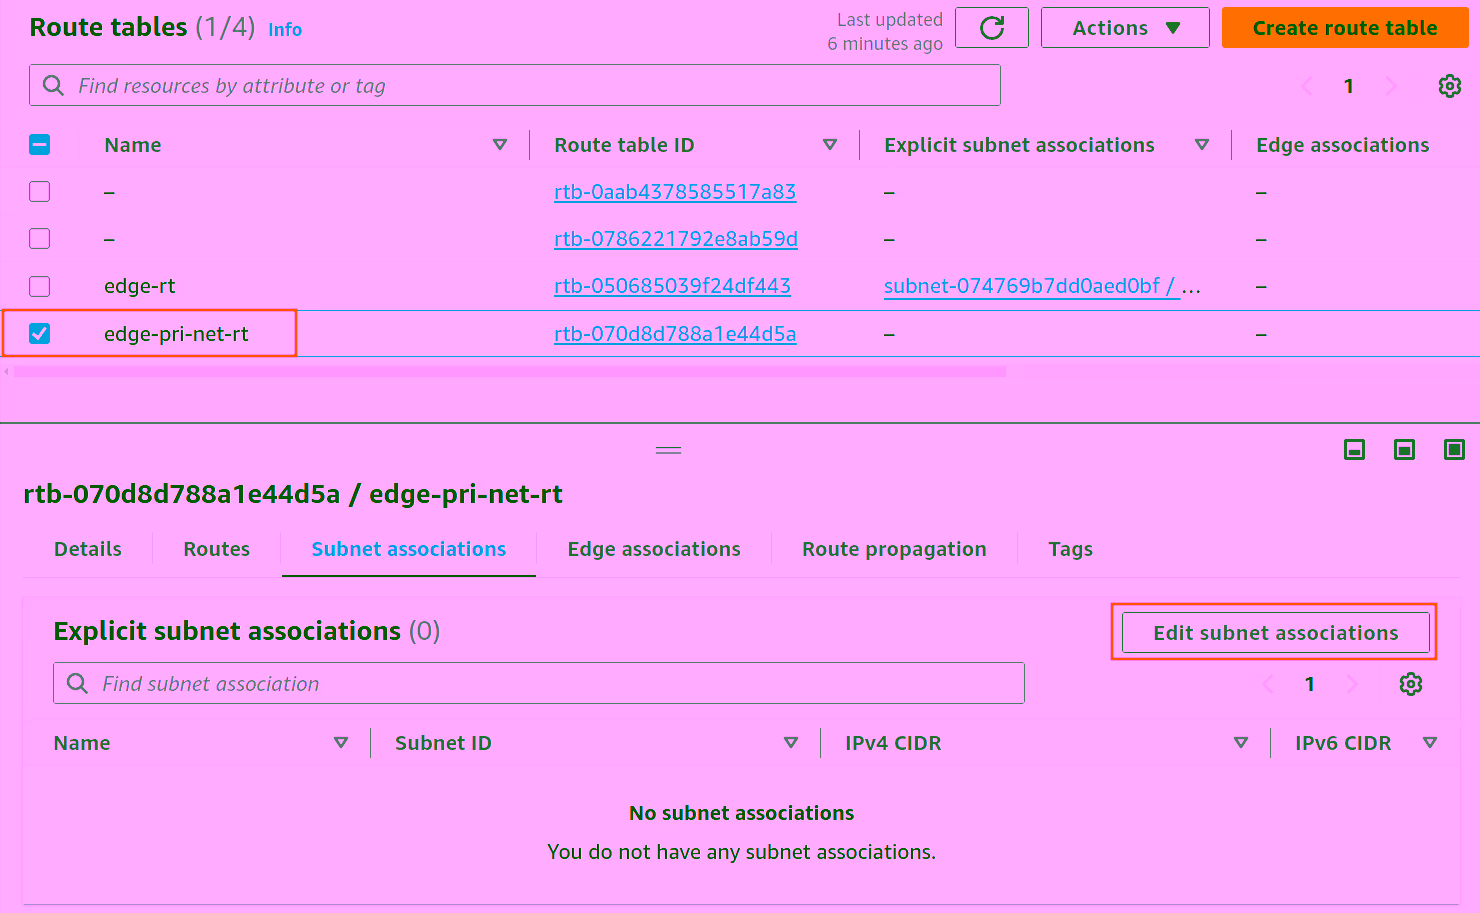
-
Create a security group named
ec2-instances-sgthat allows ICMP and SSH access from the n2x.io subnet10.254.1.0/24. We'll attach this security group to our Launch Template later.Security Group Settings
Rule Protocol Port Range Src/Dest Inbound ICMP All 10.254.1.0/24 Inbound TCP 22 10.254.1.0/24 Outbound All All 0.0.0.0/0 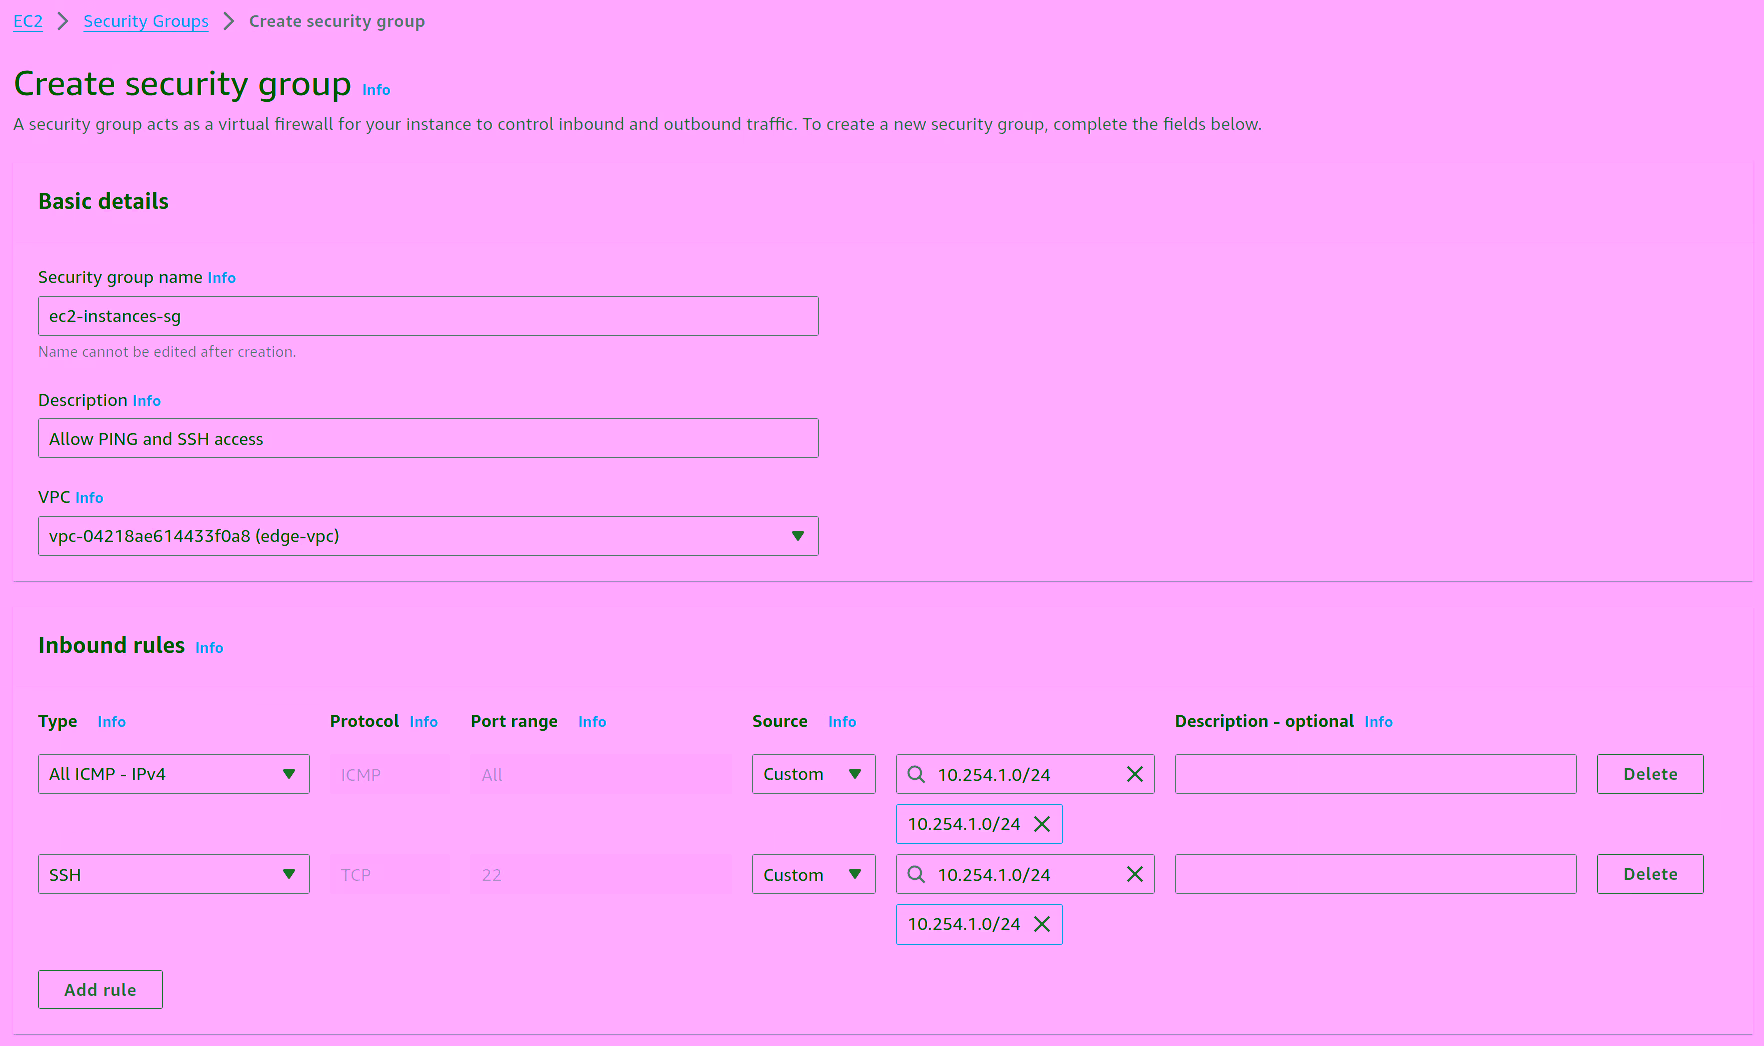
Note
Ensure that the security group rules are configured to permit inbound traffic to the required ports for the services running on the EC2 instances.
-
Create a Launch Template named
ec2-instances-template, we'll use this template to configure our Amazon EC2 Auto Scaling group. For more information on creating Launch Templates, see Create a launch template for an Auto Scaling group:Launch Tempalte Settings
Software Imagen (AMI) Security Gropup Ubuntu Server 24.04 ec2-instances-sg 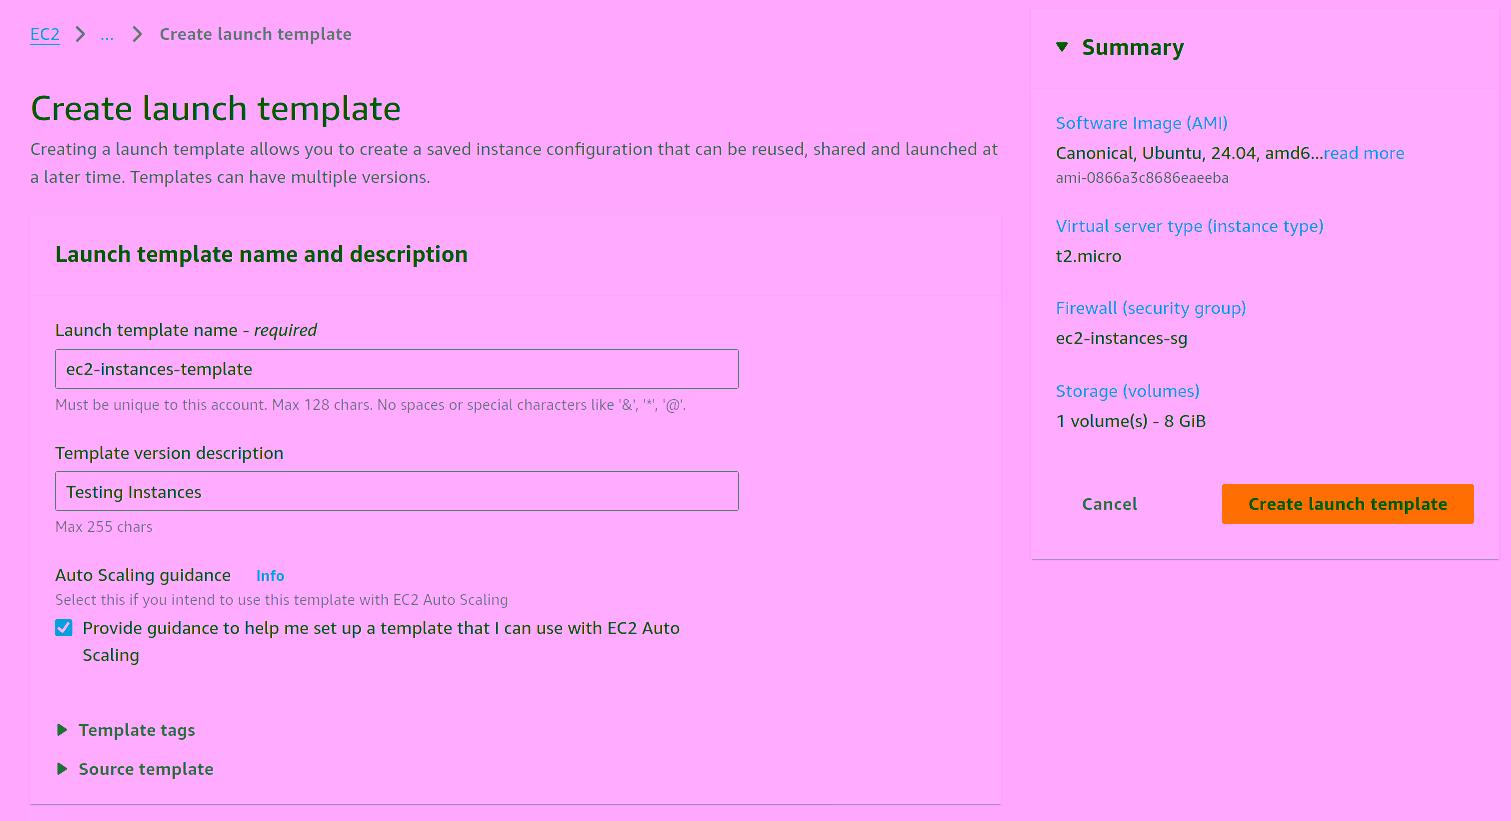
Now, we can create an Auto Scaling group named ec2-instances-asg to automatically adjust the number of EC2 instances based on demand.
The key configuration for the Auto Scaling group is to associate it with the previously created resources: the ec2-instances-template Launch Template and the edge-pri-net-az1 private subnet. For more information on this process, refer to Create an Auto Scaling group using a launch template.
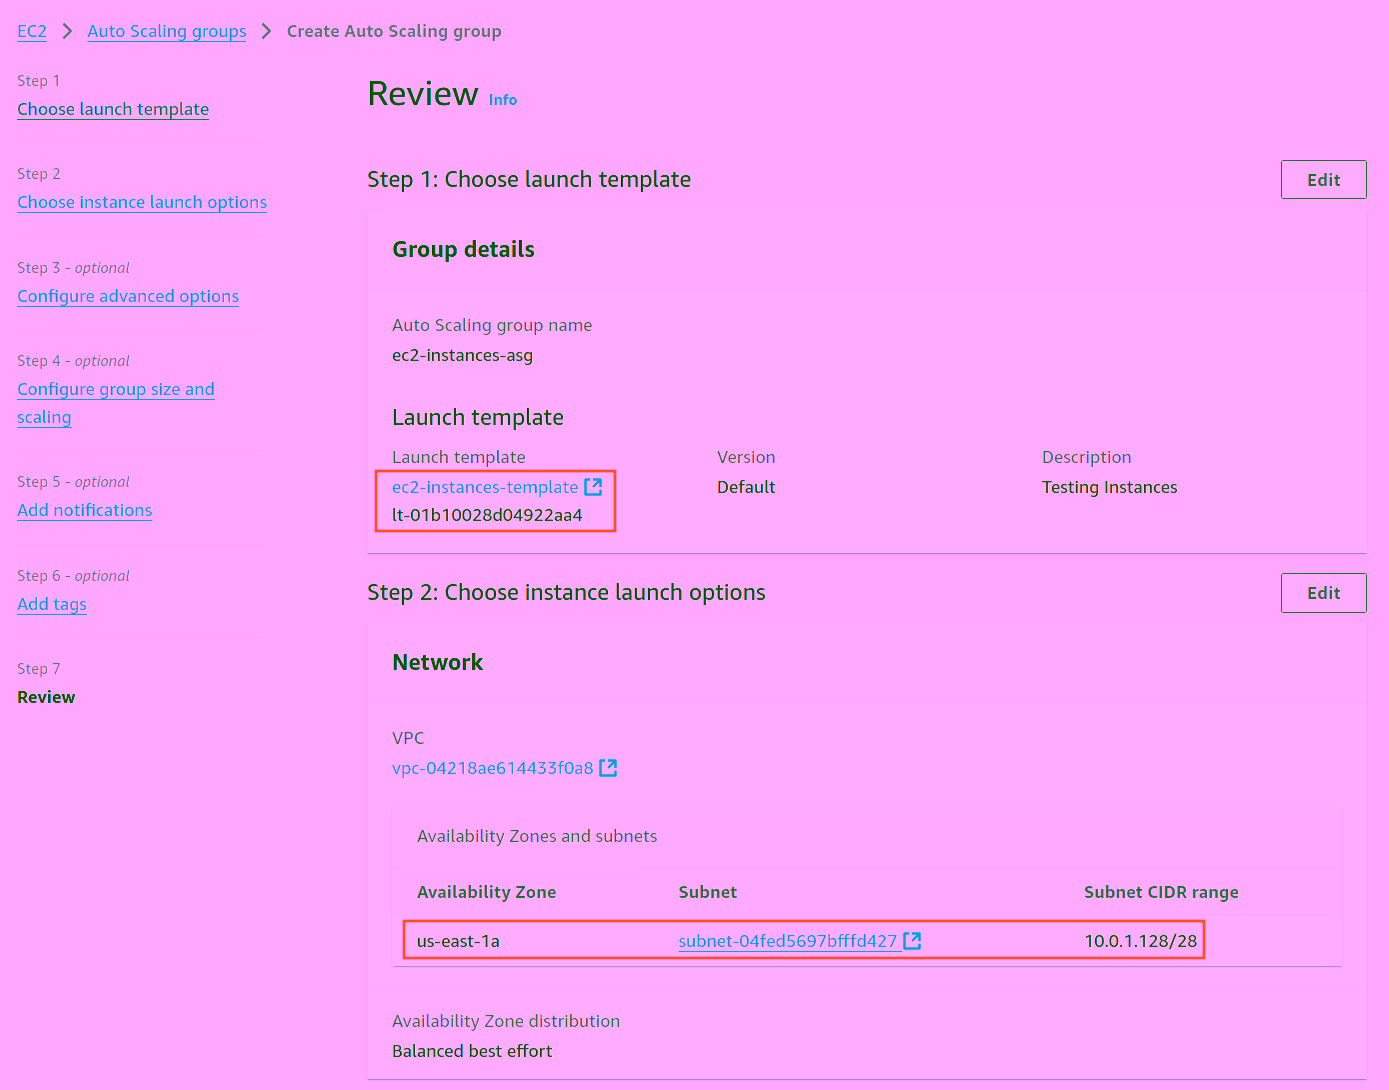
Once the Auto Scaling group is configured, a new EC2 instance will be deployed in the private subnet.
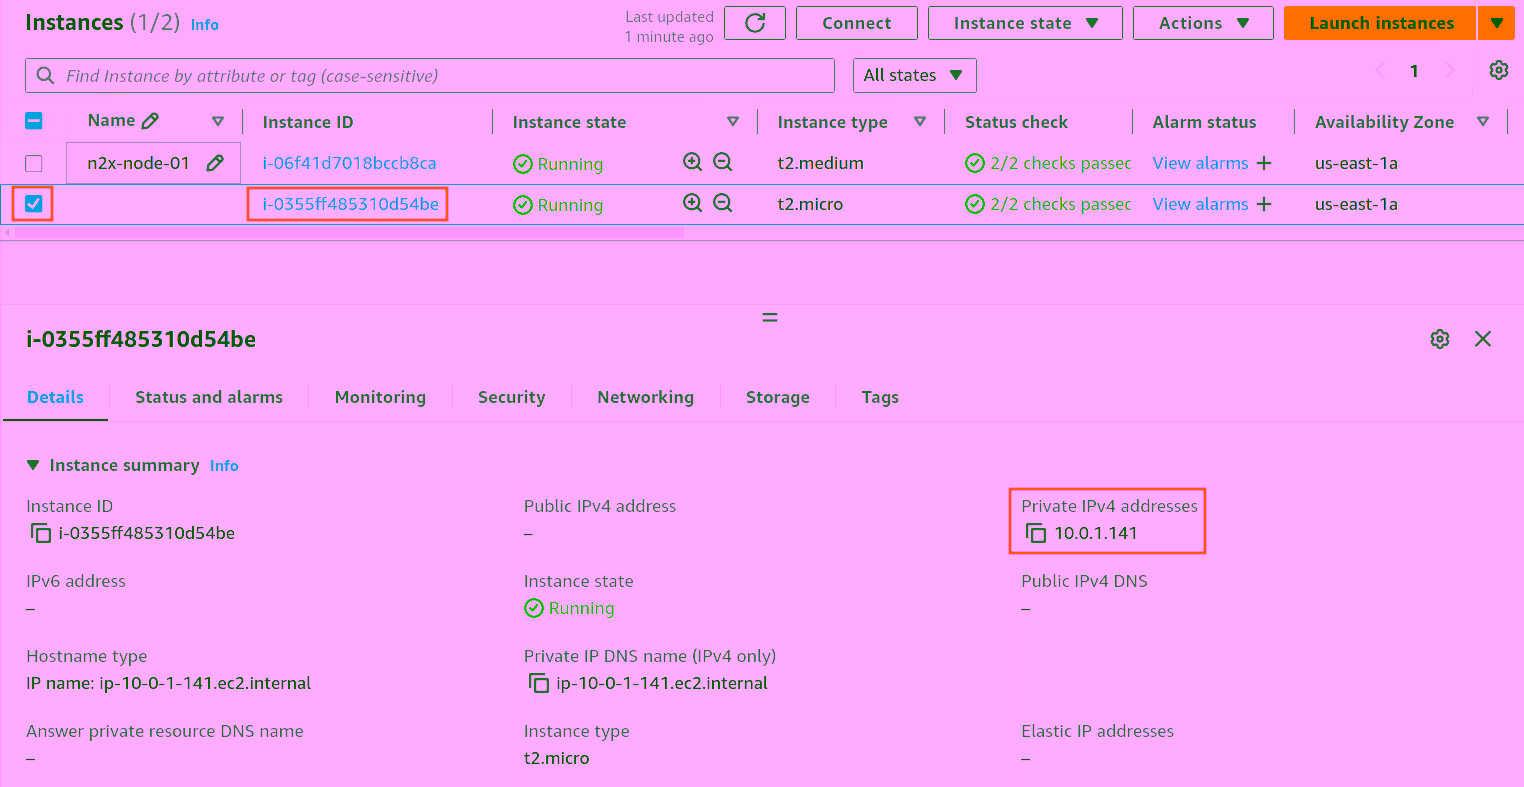
Note
The newly deployed EC2 instance will be assigned a private IP address, such as 10.0.1.141 in this example. We'll use this private IP address to connect from server-01 during the validation step.
Step 4 - Connecting the server-01 to our n2x.io network topology
Now we need to connect the server-01 must be able to access EC2 Instances.
Adding a new node in a subnet with n2x.io is very easy. Here's how:
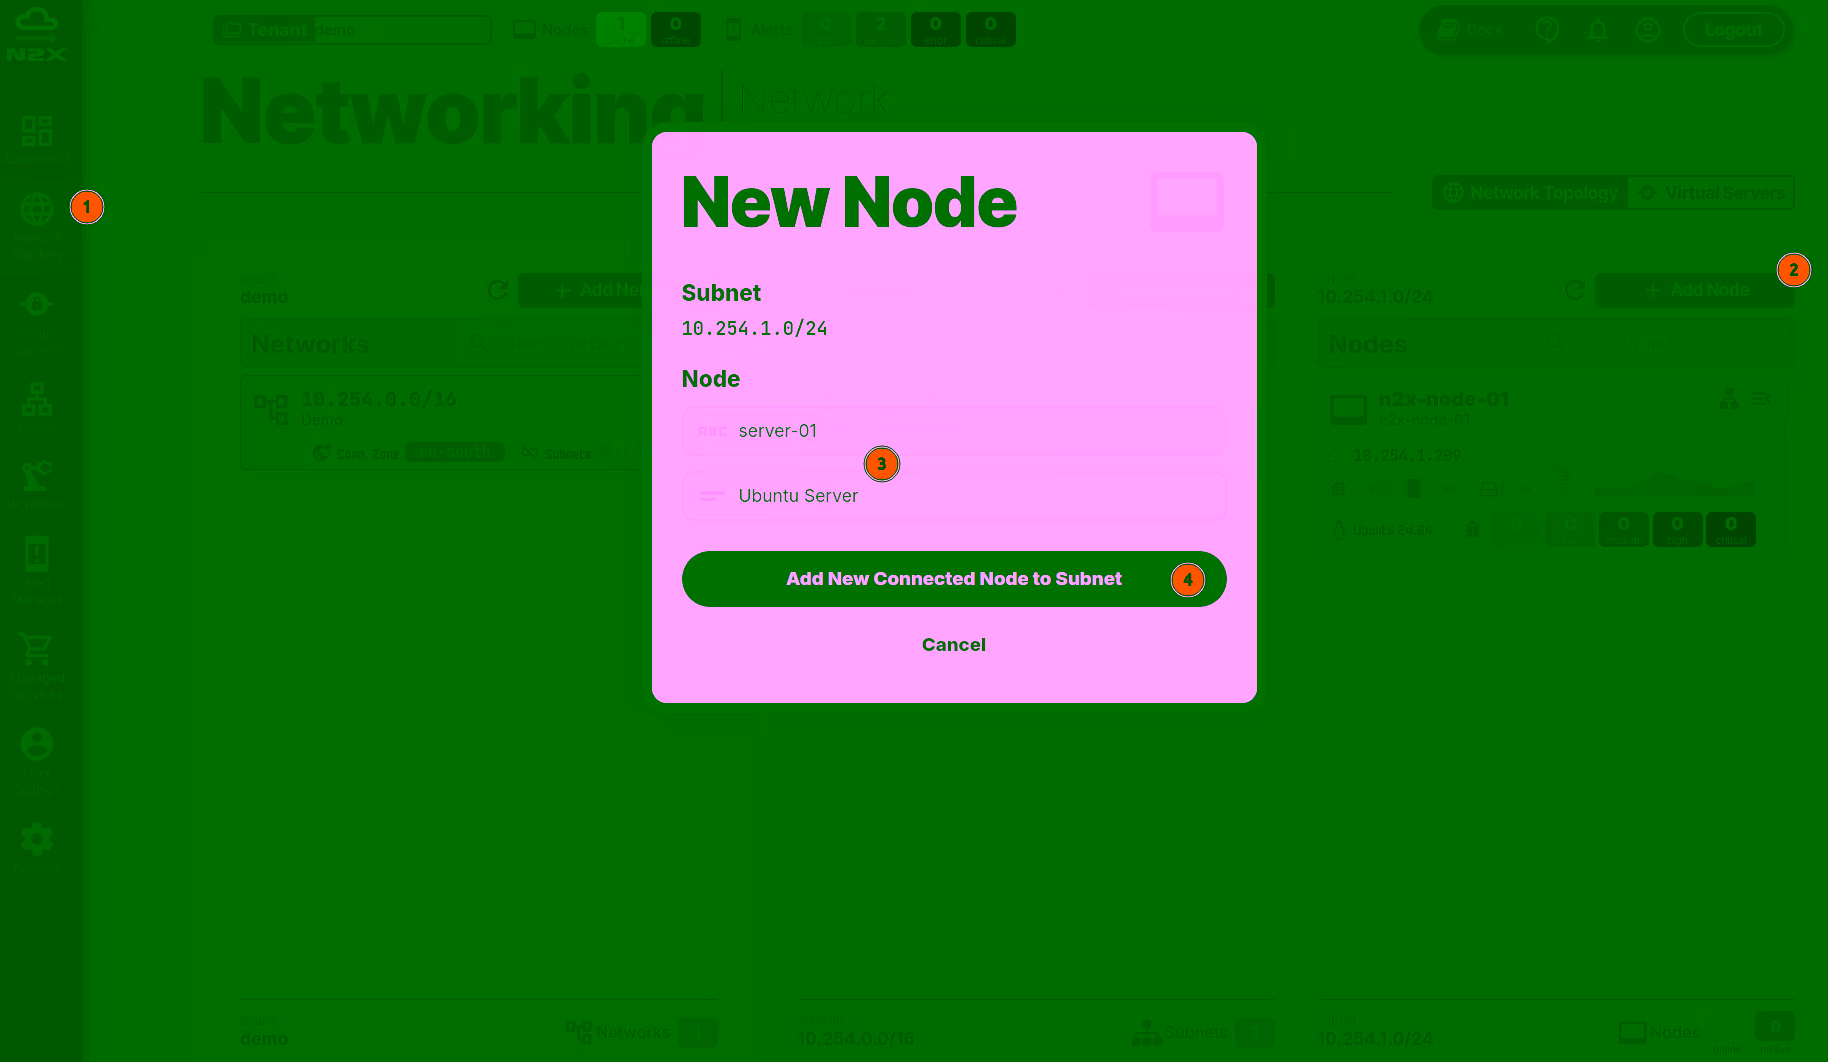
- Head over to the n2x WebUI and navigate to the
Network Topologysection in the left panel. - Click the
Add Nodebutton and ensure the new node is placed in the same subnet as then2x-node-01. - Assign a
nameanddescriptionfor the new node. - Click
Add New Connected Node to Subnet.
Here, we can select the environment where we are going to install the n2x-node agent. In this case, we are going to use Linux:
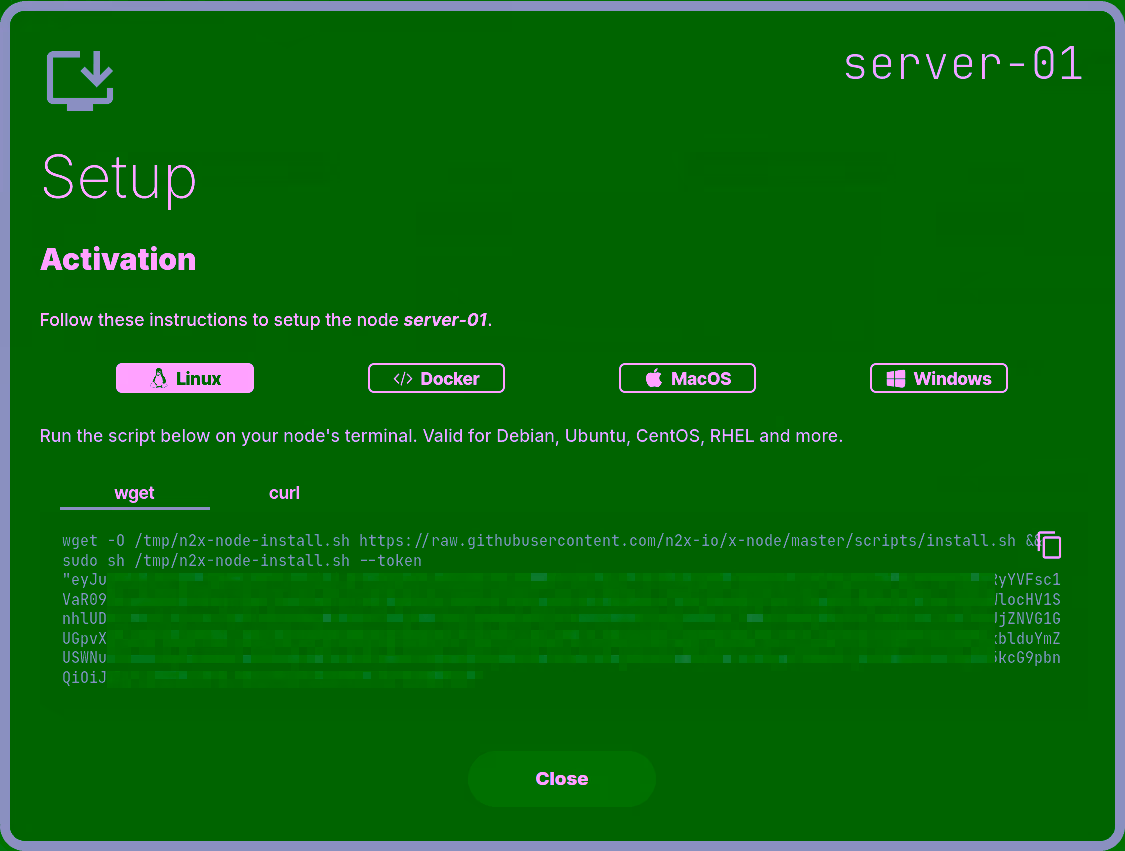
Run the script on server-01 terminal and check if the service is running with the command:
systemctl status n2x-node
You can use ip addr show dev n2x0 command on server-01 to check the IP assigned to this node:
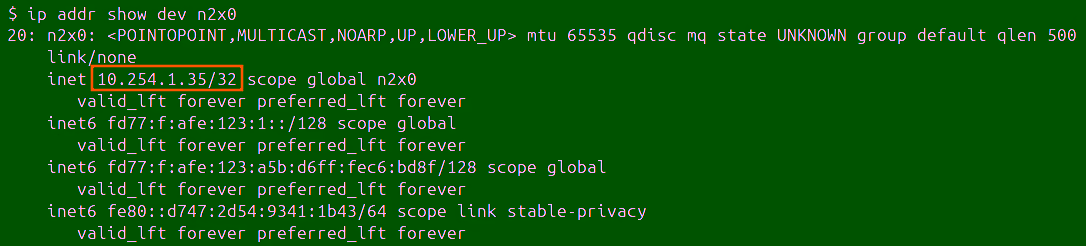
At this point, we need to make the VPC CIDR available in our server-01 importing this CIDR. For this, we need to edit /etc/n2x/n2x-node.yml in server-01 and add the following configuration:
# network routes behind this node (optional)
routes:
  export:
    -
  import:
    - <VPC CIDR>
Info
Replace <VPC CIDR> with the VPC CIDR value, in this case is 10.0.1.0/24.
Restart the n2x-node service for this change to take effect:
systemctl restart n2x-node
We can check the local routing table in server-01 with the following command:
ip route

Step 5 - Verify your Connection
Once you've completed all configuration steps, you should be able to ping or connect via SSH to any EC2 instance in the AWS VPC from any device connected to the n2x.io subnet.
We'll now verify connectivity to the EC2 instance from server-01 device. In this scenario, the EC2 instance has been assigned the private IP address 10.0.1.141.
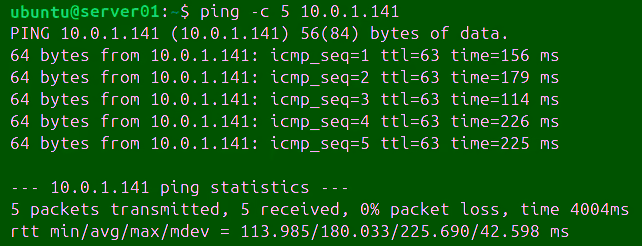
Ping Test
Let's first check if you can ping the EC2 instance from server-01. Here's the command:
ping -c 5 10.0.1.141
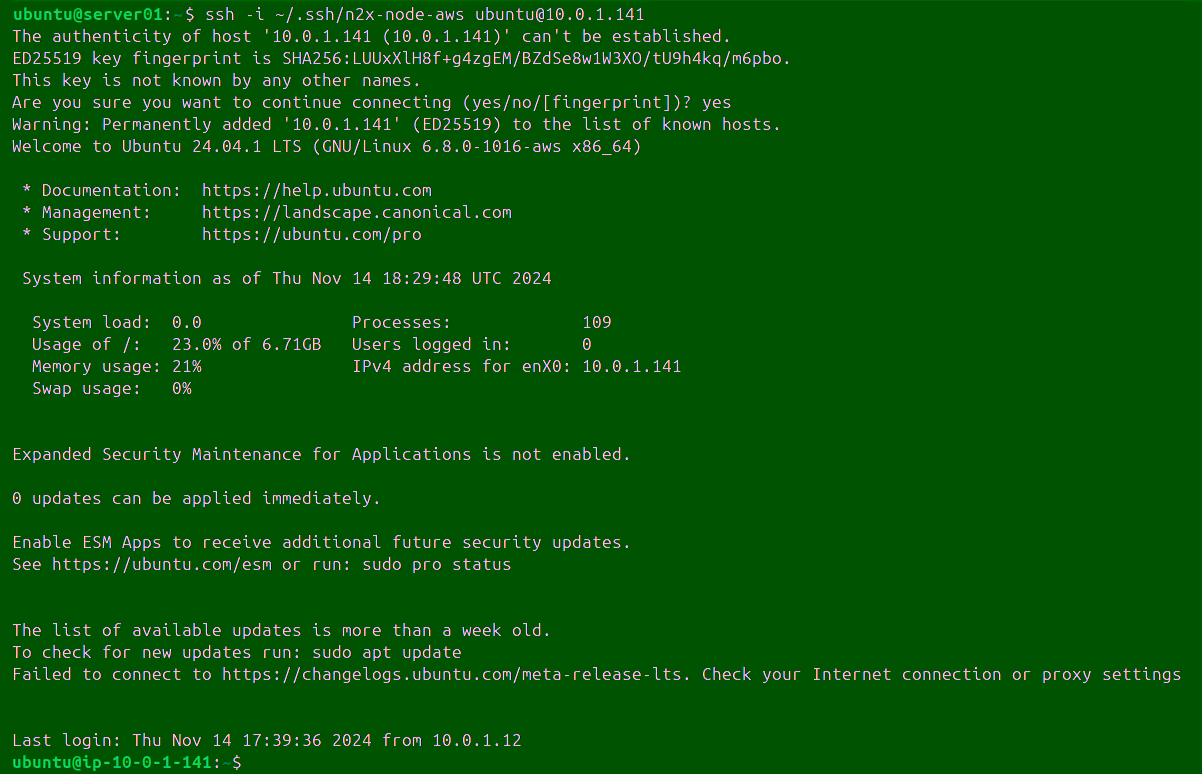
SSH Connection
Now we can attempt an SSH connection to the EC2 instance from server-01:
ssh -i ~/.ssh/n2x-node-aws [email protected]
Success
That's it! The Amazon VPC is now accessible from any device connected to your n2x.io virtual private network.
Info
For even more granular control over traffic flow across your n2x.io network topology, explore n2x.io's security policies.
Conclusion
This article guided you through establishing a direct, secure connection between your n2x.io network topology and your AWS VPC.
This setup offers a secure, cost-effective, and streamlined approach to accessing your AWS VPC resources from your n2x.io network.