How to Deploy a n2x-node in AWS
This article offers a step-by-step guide on setting up a n2x-node in AWS, including creating all the necessary infrastructure within the cloud service provider.
Prerequisites
To complete this tutorial, you must meet the following requirements:
- An AWS account.
- A n2x.io account and one subnet with
10.254.1.0/24prefix.
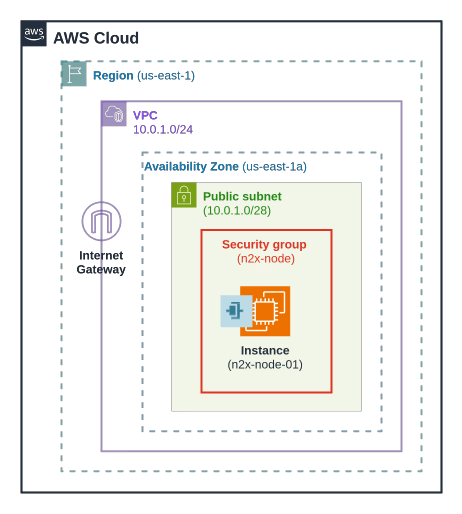
Architecture
This section provides a basic architectural blueprint to guide you through deploying a n2x-node within the AWS cloud environment. This modular design offers versatility and can be reused for various deployment goals, including achieving High Availability (HA) for your n2x.io nodes within your network.
Step-by-step Guide
Step 1 - Creating and Configuring the AWS VPC
-
Create the VPC using the values as shown in the following table. For more information, see Getting Started with Amazon VPC.
VPC Settings
VPC name tag IPv4 CIDR IPv6 CIDR Tenancy edge-vpc 10.0.1.0/24 No IPv6 CIDR Block Default 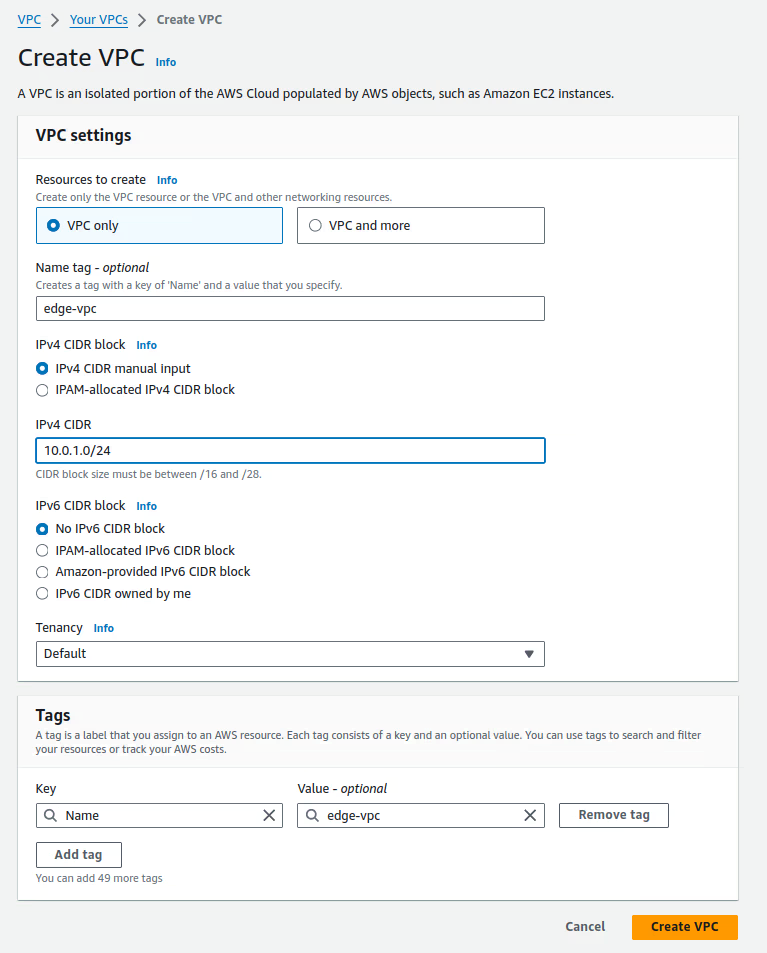
-
Create the subnet in the VPCs as described in the following table. For more information, see Creating a Subnet. In the next steps, you will configure the route tables to make this subnet public.
Subnet Settings
Subnet name tag VPC AZ IPv4 CIDR edge-pub-net-az1 edge-vpc us-east-1a 10.0.1.0/28 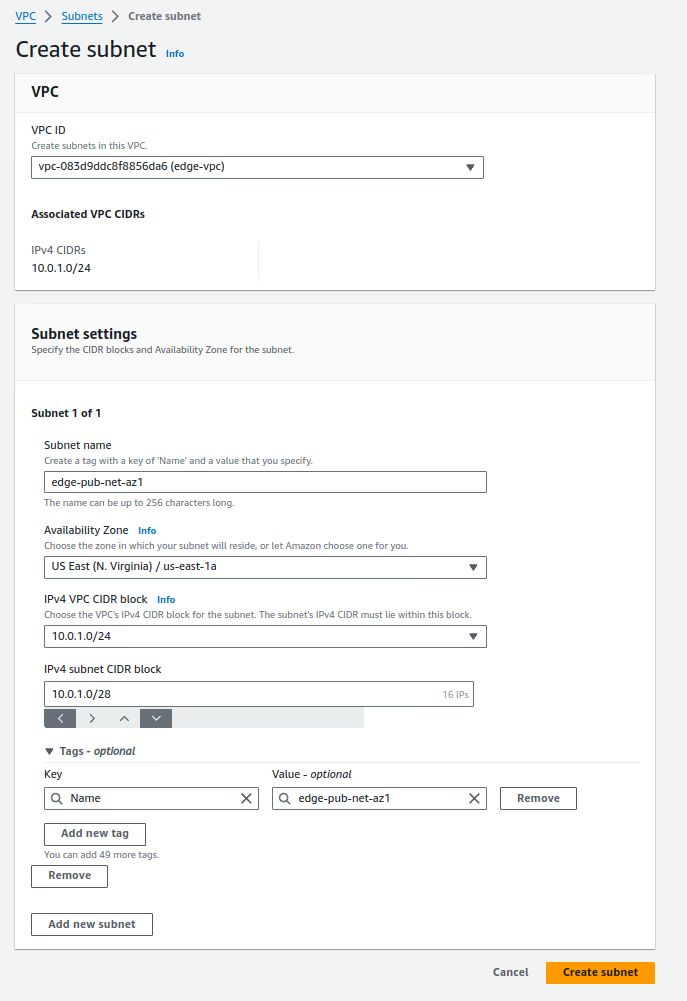
-
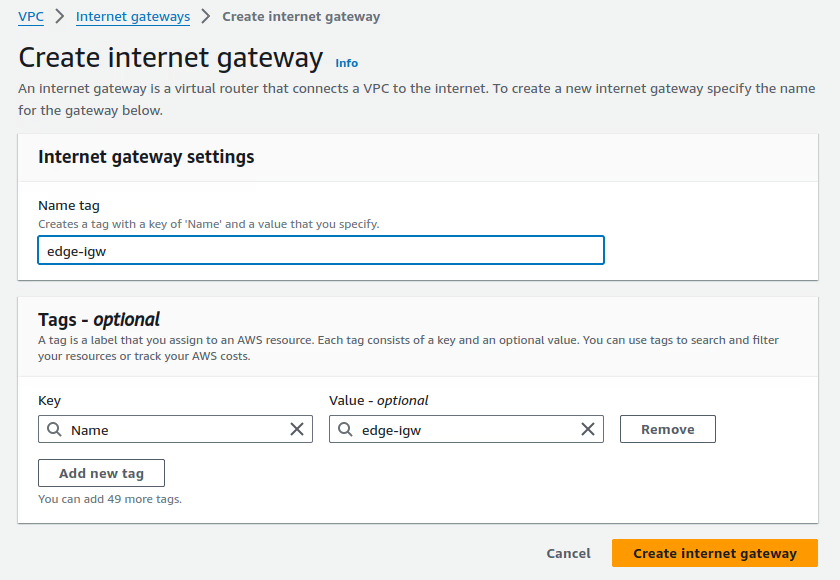
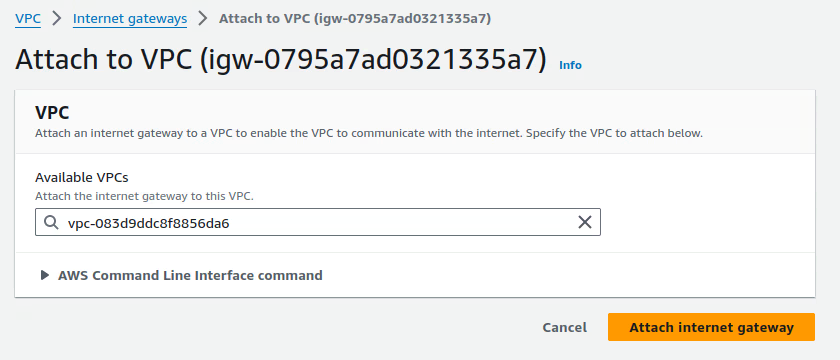
Create and attach an internet gateway (edge-igw) to the VPC edge using the name tag from the table. For more information, see Creating and Attaching an Internet Gateway
-
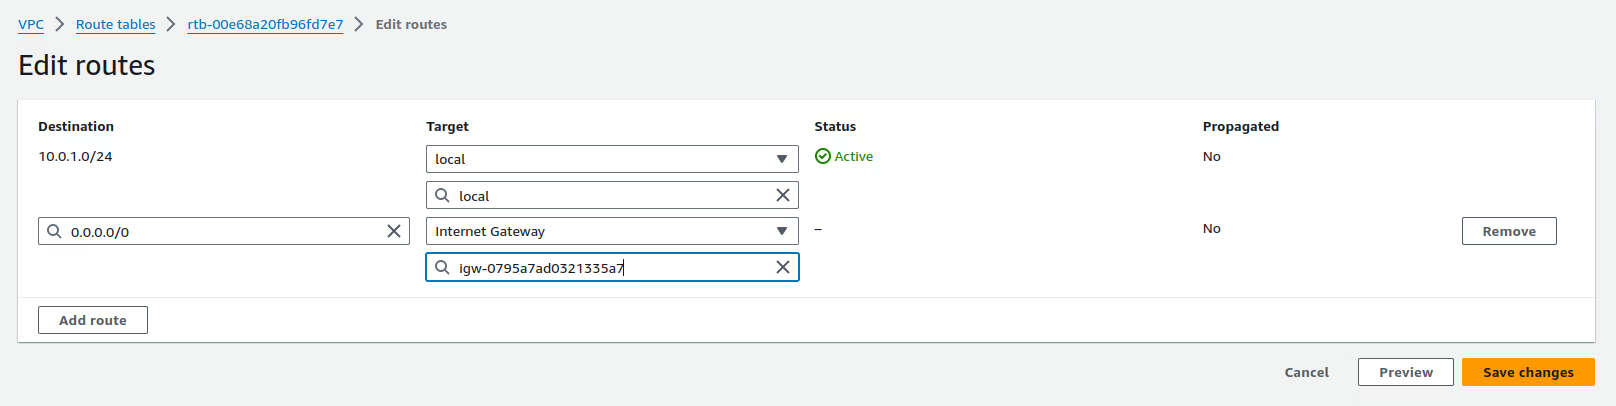
Set the name (edge-rt) to the default routing table in the edge-vpc and add a new default route with the destination set to
0.0.0.0/0and associate the route with the internet gateway (edge-igw). For more information, see Adding and Removing Routes from a route table.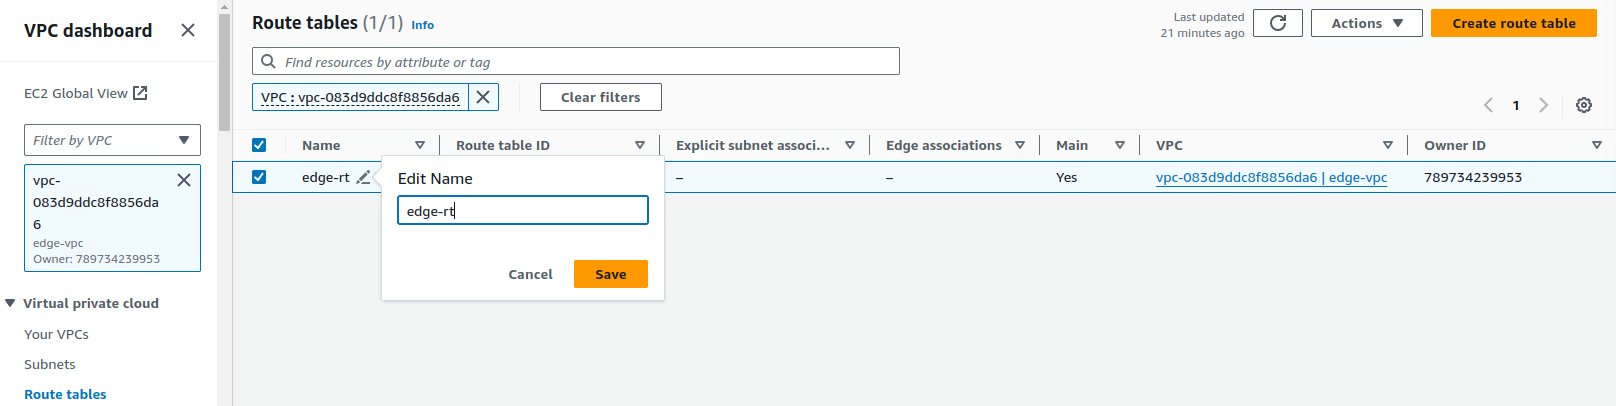
-
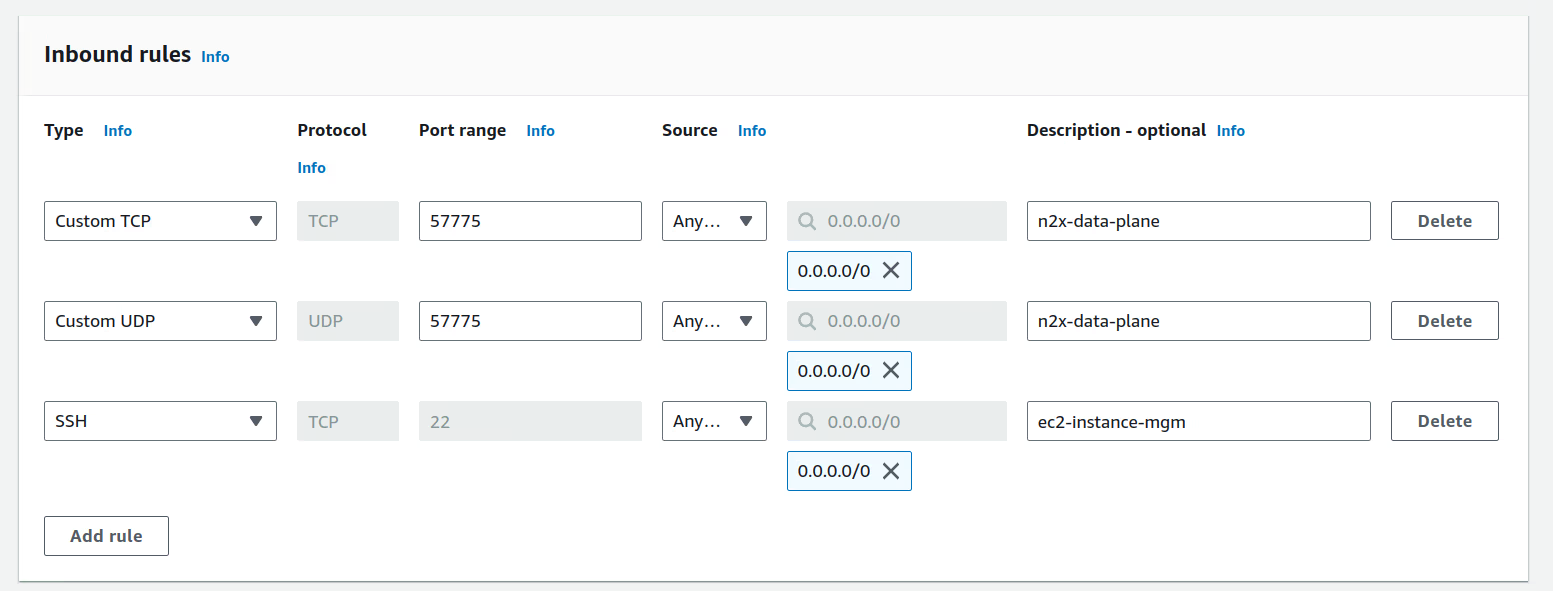
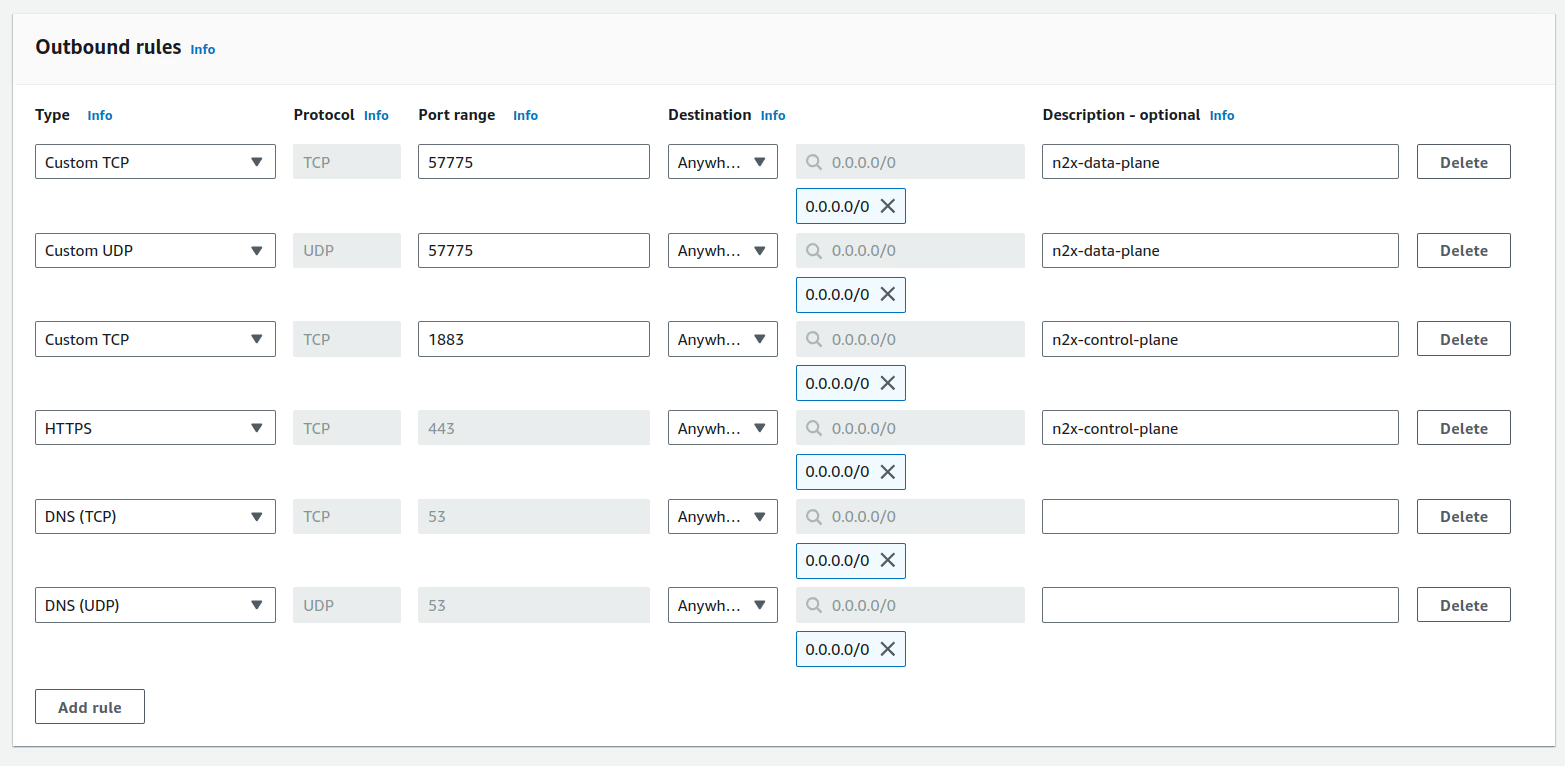
Create a security group named n2x-node with minimal inbound and outbound security rules as described in the table below.
Rule Protocol Port Range Src/Dest Description Inbound TCP/UDP 57775 0.0.0.0/0 n2x-data-plane Inbound TCP 22 0.0.0.0/0 ec2-instance-mgm Outbound TCP 443 0.0.0.0/0 n2x-control-plane Outbound TCP 1883 0.0.0.0/0 n2x-control-plane Outbound TCP/UDP 57775 0.0.0.0/0 n2x-data-plane Outbound TCP/UDP 53 0.0.0.0/0 DNS-name-resolution Info
For direct communication between n2x.io nodes, open inbound connections to ports 57775 TCP/UDP. (See direct connection for details).
Note
Open inbound connectivity to ports
SSHorRDP(or both) for remote VM management, as needed.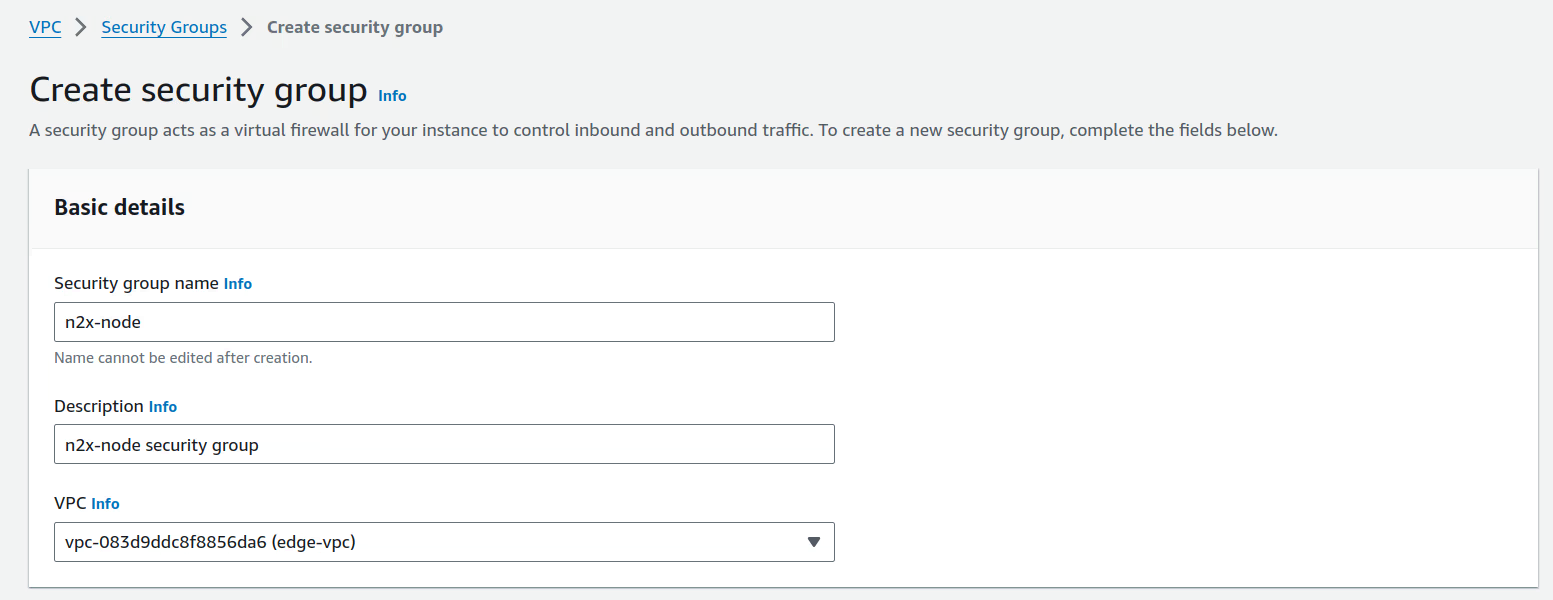
Step 2 - Launching an EC2 Instance
Launch the EC2 instance to support the n2x-node with the following configuration:
Note
Please note that this tutorial uses a Linux OS with an Ubuntu 22.04 (Jammy Jellyfish) but you can choose any OS supported by n2x.io and AWS instances.

Step 3 - Connecting EC2 Instance to our n2x.io Network Topology
To connect your EC2 instance to the n2x.io network topology, you'll need to:
- Add a new connected node to your subnet.
- Install the n2x-node agent on the EC2 instance.
Step 4 - Verification
Let's confirm that everything is operational:
-
Check the
n2x-nodeservice status onn2x-node-01using:systemctl status n2x-node
-
Verify that the
n2x0interface onn2x-node-01is active and has an IP address assigned by using the following command:ip addr show dev n2x0
-
(Optional) To verify connectivity within the n2x.io subnet, you can perform a simple test if another node is present. In this example, we'll use
test-node-01which has the IP address10.254.1.209.ping -c 5 10.254.1.209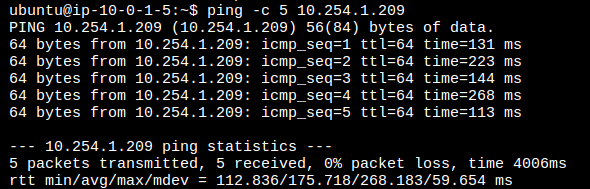
Conclusion
We've provided a comprehensive guide for launching a n2x-node in AWS. Feel free to adapt this foundation to meet your specific needs and implement more complex scenarios.